A great find! Thrift shop cheap!
A Drexel nine drawer dresser quite dusty, dirty and beat up, but very solid!
 |
| Very heavy, so it was a two person transport. |
 |
Because this doesn't really work for us,
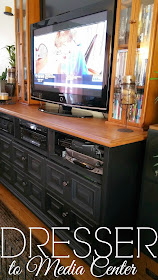
the dresser will become a media center. |
 |
Paint and nail polish spotted, and a little worn
finish can all be removed from this
veneer top with a lot of light sanding. |
 |
| The drawers are well made, nothing loose or broken. |
 |
| A bonus feature in a drawer. |
 |
| First round of sanding with an orbit sander. |
 |
| Trim edging is primed and painted but an angle tip sander is getting it off. |
 |
| Not bad for veneer! |
 |
| Edges are coming clean. |
 |
| Drexel Brand stamped in the drawer. |
 |
The drawers were constructed very well.
They are quite heavy too. |
 |
First coat of sprayed paint on the
drawer fronts in flat black enamel. |
 |
| Second coat. |
 |
| Very quick dry color for the top, sanded and ready. |
 |
| The pecan color was a good choice! |
 |
| The veneer grain still peeks through nicely. |
 |
| Now for the base. I drilled 3 cord holes on the top shelf, intended for electronics. |
 |
Taping off the top from the base,
it was clean up time and paint prep. |
 |
The top shelf area needed to be painted all over
each surface, and it did take two coats. |
 |
Dried, and ready for the knobs. Easy stuff.
|
 |
| Now to load it up with "media stuff" |
 |
| I love these copper highlighted knobs. They blend perfectly. |
 |
| This is much better. |
 |
Before and after ... happily ever after ~
|
~~~~~~~~~~~~~~~~~~~~~~~~~~~~~~~~~~~~~~~


