


 |
| The story of a table that almost wasn't. |
A friend contacted me and said she had this table and wanted to know if I could do anything with it. I jumped at it and said "Yes!"
My mom has been wanting a vintage chrome table for some time and this was a perfect opportunity! I told Darlene that this would go to a good home and I'll do my best with it.

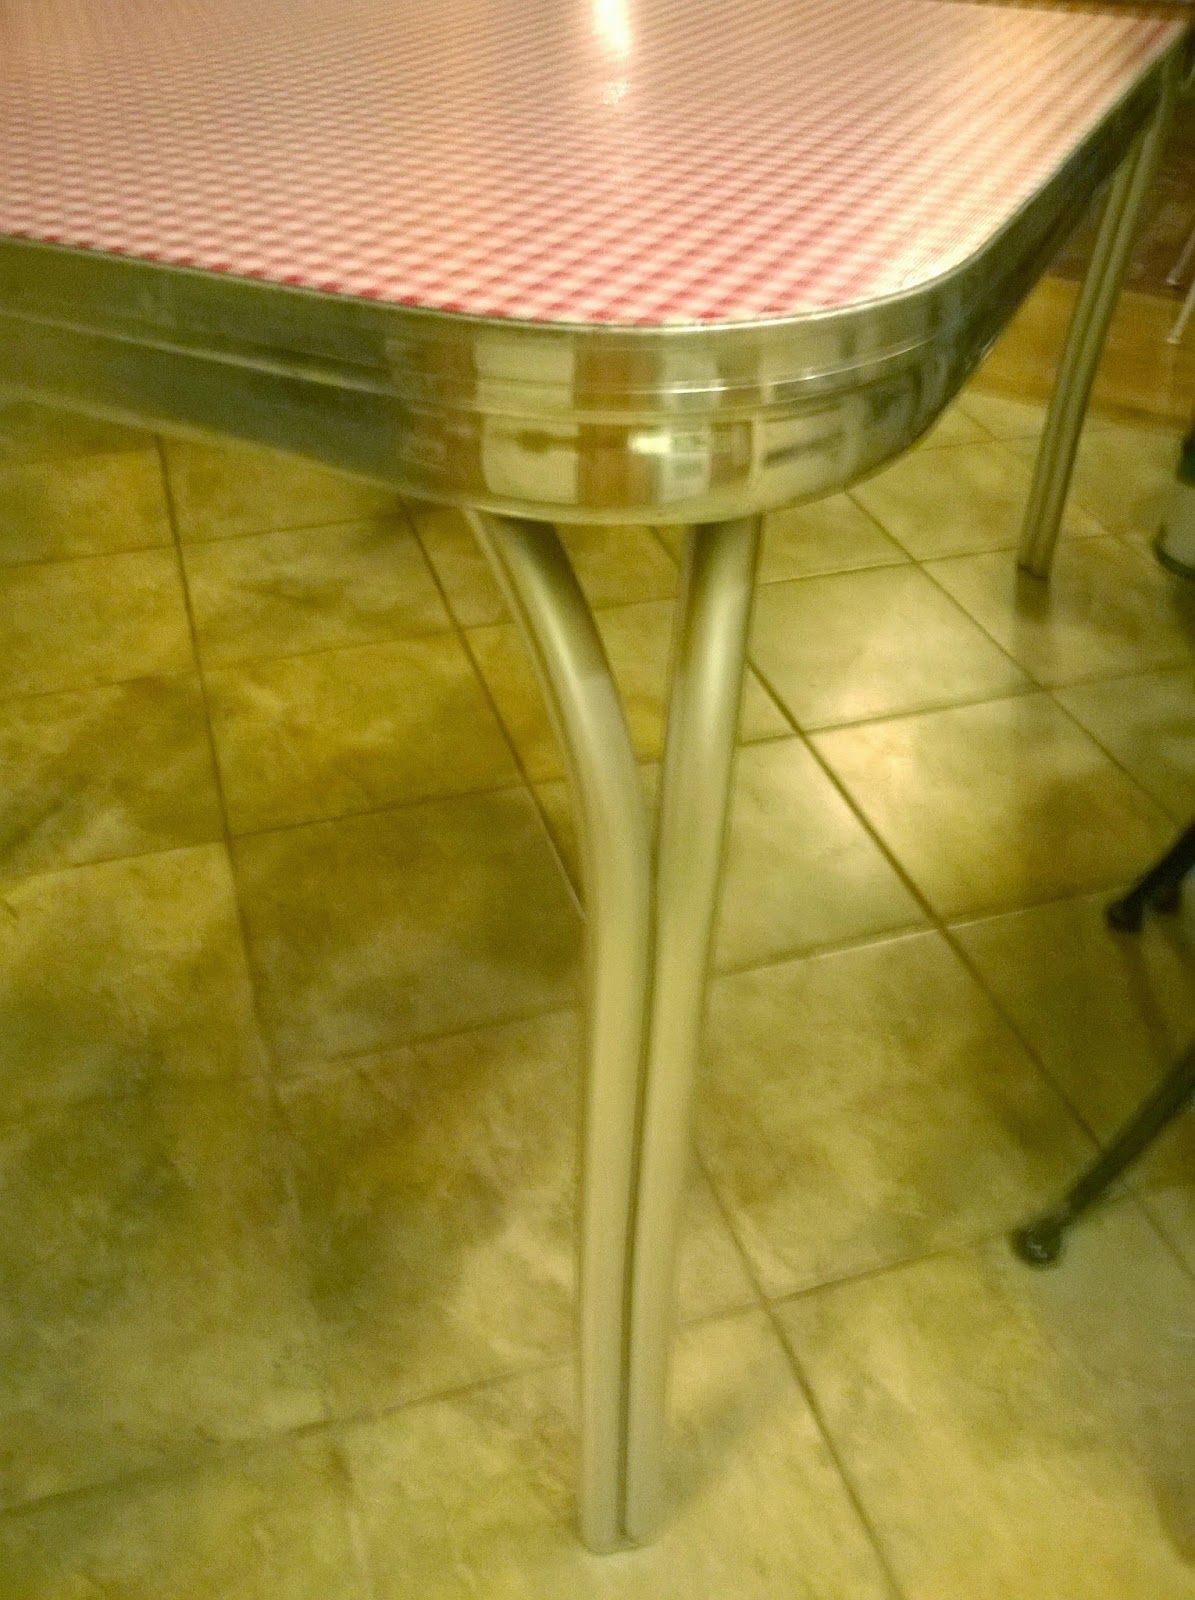
So I told mom I got my hands on one and wanted to know how she wanted it done. Of course she wanted red to match her decor and as a reminder of the table my grandmother had. The legs were badly rust pitted, so I asked if she wanted paint color or chrome. She wanted chrome.

The main table top was chipped and scratched up. My first thought was to fill, prime and paint using a rag roll method to replicate the original "cracked ice" formica.

 |
| 50's "Cracked Ice" formica in red. |
The leaf extensions were in far better condition.

The legs were scary and challenging.

I used everything and every method to clean them. Sanding, chemicals, natural ingredients and even vinegar... ketchup... a next time this happens, I'll get a grinder.
After three weeks of chewing up all of my dremel wire and sanding wheels, the pitting remained deep. This was the best I could get the legs.


Getting the legs to the best I could, priming them helped to smooth out the pitting.

Then on to layer some chrome... well, I am no pro and I know chrome dipping is dangerous. To have it done professionally is extremely expensive. Certainly way out of my budget.
So for the first coat, I used a crafting spray on paint, "Mirror Glass".
It didn't appear mirror glass at all.
For the next coat, I used Krylon Color Master paint and primer in Brilliant Silver. It worked much better. It was followed up with two more even sprayed coats to ensure a good coverage.


I scratched the idea of painting a faux "cracked ice" formica in fear I wouldn't get it right and end up with a pile of enameled mess. Thinking a decoupage red gingham fabric followed with resin or a hardened polyurethane top would match the kitchen decor, I got 3 yards of it to cover the table and the extensions. In attempt to do a test run, I tried it on one leaf.
It was a very bad idea.
Being a lined, checkered design and a thin fabric, it zig zagged. It frayed. The original tabletop showed through the fabric. The edges wouldn't finish off on the chromed edges. It was ugly. Putting a clear coat on this mess would only accentuate the disaster. I could've peeled it off, primed and painted and started over but didn't feel confident the edges would seal nicely with fraying fabric. So I just peeled it off and cleaned off the surface.
 |
| Failure! |
So I checked back with ordering the oil cloth I previously used to upholster the vintage kitchen chairs. I got the material in two days for the chairs and could still get this done in time. Of course, as my luck has it lately, it sold out. So I was off to the fabric store for ANY oil cloth. I managed to get 3 yards of the same red gingham I ordered previously. My luck changed!
I tried it on one of the leaf pieces with spray adhesive...
it went on like a dream. Using a rolling pin to ensure an even layer, it didn't even have a single air bubble. It finished off on the edges perfectly with a razor blade, laying into the crevices. The leaf looked like it had been manufactured with a permanent table cloth, but very durable, scrubbable and... it is red gingham. I heard the Angels sing.


Then on to cleaning the chrome banding around the edge.
The dull gray is a natural effect on chrome. Normal cleaning and buffing eliminates dulling but this table has been stored for a very long time. Using Mother's Mag and Aluminum Polish to buff the chrome...


After finishing both leaf extensions, I moved on to the main table part. Again, the oil cloth laid very well. I loved it.

It trimmed off perfectly!
I ran out of contact cement and tried rubber cement to secure the inside edges. Unlike contact cement, it remained wet longer. So I taped it down to hold for a few hours.
 |
| Another failure! |
When I returned to the progress... I cried. I cursed. I... almost gave up.
The rubber cement and its vapors found its way into the oil cloth and half way through the table top. It made rippling waves and huge air bubbles; basically ruined the entire job. After spending the night and wee hours of the morning, gluing with new contact cement and trying to pin and press out bubbles and ripples, I was defeated. It couldn't be corrected. What a huge waste of time, work and money. I had to peel off the oil cloth and use mineral spirits and a lot of hot water and soap to remove the adhesive. It was a sticky and miserable job.
Back to square one.

So, after picking myself up off the floor I prepared the top for painting.
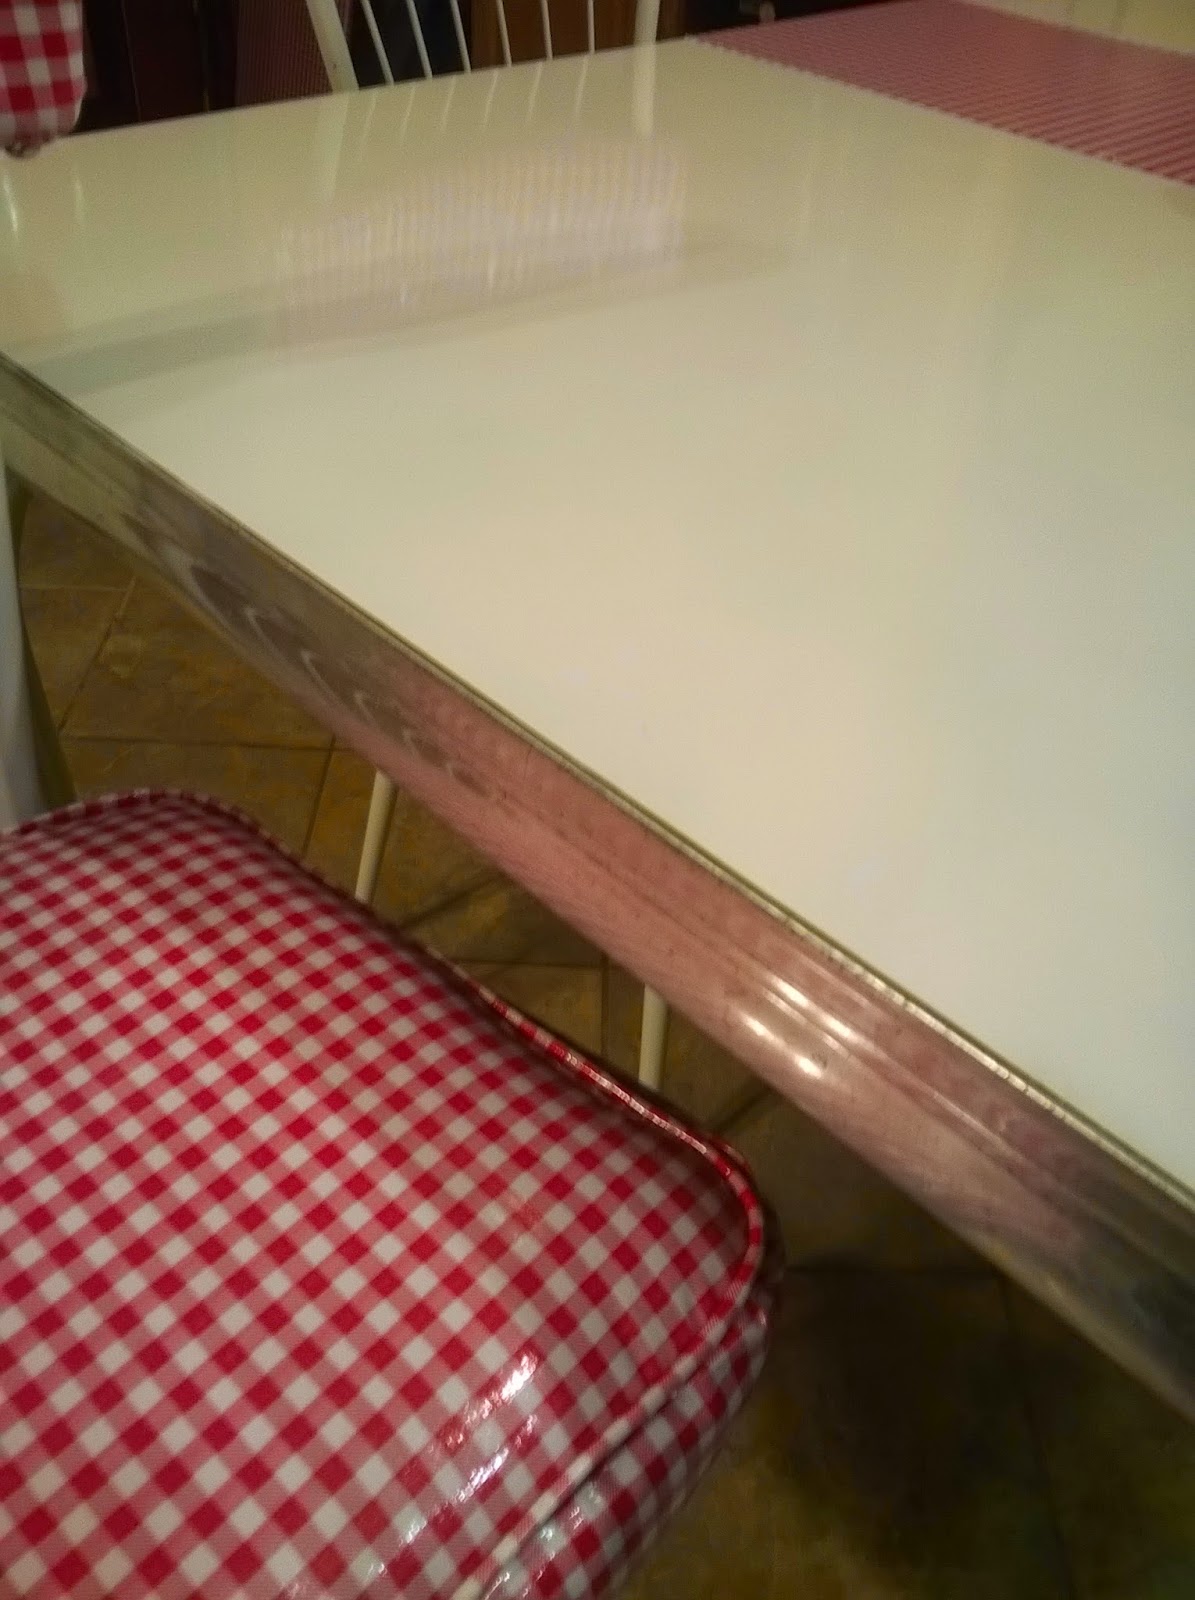
It looked amazing already with white enamel.

Now with a white glossy top... what to do? It was too plain. No red and I need red. I thought of stenciling some kind of design. But this style table needs "inlay" like the vintage formicas, not layers and layers could possibly lead to peeling and chipping. I even thought of ordering red "cracked ice" formica to completely restore the top, but at $350 plus shipping and no time, it couldn't be a consideration.

I placed on one of the table extensions with the oil cloth still intact.
And liked it.
There was the design.
And it was red.
And it matches the gingham kitchen! So vintage looking too! By golly, I think this challenge is over!


Next, Mom's birthday gift. I ran down to Aunt Katie's Attic, a local vintage retailer and got my mom four old pyrex bowls. She wanted yellow but I got red, orange and green too. Scored!
I really put myself under pressure for this project. First, the table was given to me by someone who loved the table and hated to part with it. She felt I was the right person to give it to. I didn't want to let her down, and knowing my mom wanted one, I wanted it perfect for her. I had other projects finishing up simultaneously with the same deadline; plus I had my mom's birthday, Thanksgiving, and a snowstorm that almost ended up in no Thanksgiving trip back north after all of this. My stress level was high.

Vintage all coming together. I am breathing now.


The cracked ice replacement is still a consideration, but I'll need to make a lot of extra money first.


This table was my most challenging project to date.

But I think it was all worth the troubles.

And the storm cleared for the trip north for Thanksgiving! (Insert huge smile here.)

~~~~~~~~~~~~~~~~~~~~~~~~~~~~~~~~~~~~~~~~~~~~~~~~~~~~~~~~~~~~~~~~~~~~~


Wow you did such a great job on this! I think the red gingham leaf insert compliments it nicely. I felt bad that you had to start again after using the rubber cement though.
ReplyDeletetotally awesome and wonderful end result! Love the table and the chairs and the accent of the gingham vs the whole top (i think) is better than the whole table in it. If she doesn't love it and appreciate all your effort, I want the whole set :)
ReplyDeleteYou are ridiculously talented! I am always awed after I see your projects...this one is no exception! :) This truly is a work of art and a labor of love!
ReplyDeleteOh my gosh Robin, my heart sunk while reading that you woke up to a complete mess after all your hard work and luck finding the same oil cloth. But like so many fails, they oftentimes become blessings in disguise. I think the stripe of oil cloth against the glossy white is fabulous and the perfect amount of red with the gingham chairs. Talk about a lot of work getting there but the makeover you gave this set is stunning! You are one talented gal I must say!
ReplyDeleteSuch a fabulous job. You are no less than a magician!! The table look brand new to me.
ReplyDelete-Tanya
http://tanyaanurag.blogspot.com/
Robin, I am so glad you didn't give up on this project, though I certainly would have understood if you had! The end result is absolutely stunning :)
ReplyDeleteIt was a learning project, for sure. At least next time, I'll know what to do and what to avoid :)
ReplyDeleteThank you so much! ox
Thank you so much! ox
ReplyDeleteShe was so pleased. I think I just put too much pressure on myself between the projects, my mom's birthday and Thanksgiving. It was my own trials and errors. :)
The white space with the insert works best after. My mom is making gingham placemats for it. I gave her the extra yardage of the fabric that I didn't use at all.
ReplyDeleteThank you for liking... and wanting them lol! :D
Aww, thank you Kim! Hugs!
ReplyDeleteI put myself into the frustration and it all worked into place after all. (Whew!) lol
ReplyDeleteThank you so much for your sweet visit! ox
Thank you so much, Marie :)
ReplyDeleteIt was quite a learning experience. I know now I should have gone for the rag roll technique from the get go. But with gingham to match the kitchen decor, it finally came together. The white space actually worked better because my mom is making gingham placemats. If the entire table was the same, it would have been way too much. You're right, it was a blessing in disguise.
Oh, and I'll never use rubber cement for anything ever again LOL
ReplyDeleteWow, I can't believe how good that table turned out! I've seen lots of these chrome and Formica tables in sad shape and never thought they could be saved. You proved me wrong! I love it!
ReplyDeleteTania
I love how it turned out. The gingham down the middle of the table looks like a table runner. Very nice.
ReplyDeleteI had a couple of ideas, and failed attempts, but do know now how to handle it. I'm so glad my trial and error has given some encouragement. :) Thank you, Tania!
ReplyDeleteThe leaf extensions saved the day/table. :)
ReplyDeleteIt took a one experiment after another and to work out after all.
Thank you so much for your kind thoughts.
this looks great. we did a retro theme for our basement, and i wanted a little bistro set like this. we were given an oval table the size of yours, and just used one half of it and anchored it to the wall. love the retro look.
ReplyDeleteb
Wow, that came out awesome! Thanks for posting. Hello from Farmgirl Friday Blog Hop.
ReplyDeleteOh my! A half table anchored must have the total retro diner affect! I want to see it and your basement! Can you post it here? It sounds wonderful! :)
ReplyDeleteHi Melissa! Thank you so much for visiting the post!
ReplyDeleteI cannot believe the difference in the before and after! I would've considered that table beyond saving. I really really really like the white with the gingham too. I think it's better then the plain gingham. I hope your mum loves it.
ReplyDeleteSo glad you didn't give up :o)
ReplyDeletemy oh my Robin! You're a brave soul and you really love your mom! What an awesome makeover on this fabulous chrome table!
ReplyDeleteHi there! I hopped over from Catch as Catch Can to see your fabulous upcycle. You did an amazing job--I bet your mom is thrilled! Blessings, Cecilia
ReplyDeleteThis looks amazing! Pinned and tweeted. Lou Lou Girls
ReplyDeleteI love this! This is a great re-do! I've had projects like this give me "issues" too but it's such a great feeling when you're finished and end up with something SO great. Wow!!
ReplyDeleteThank you so much, Gail! You made my day! :)
ReplyDeleteI'm so glad you stopped, Cecilia! Thank you!!!!
ReplyDeleteThank you so much for sharing, Kim! :)
ReplyDeleteI'm so glad you like it! Thanks so much, Jen! ox
ReplyDeleteWow, what a challenge this was but your perserverance paid off. I love the accented red leaf, glad that one held up for you. I am sure your mom loved it! Thanks for sharing with #SmallVictoriesSundayLinkup as always!
ReplyDeleteThis turned out AMAZING! I have two of these in my grams basement just waiting to be brought back to life! Like yours the legs are rusty and gross looking and I have been taking my good old time getting to them. I Hope you had a wonderful Holiday and have a fantastic New Year!! Thanks for linking up at Totally Terrific Tuesday! Cant wait to see what you bring this week!!
ReplyDeleteJess @Liverandomlysimple
You did a fantastic job! I can't believe the table legs transformation. Well done and thank you for linking up to On Display Thursday!
ReplyDeleteI'm so excited you are working on two of these Jess! Thank you so much for being a great hostess! Happy New Year :)
ReplyDeleteThank you! I'm so glad you stopped by! You're a wonderful hostess! :)
ReplyDeletefelt the same way about another history investigation for my birch kitchen cupboards, which were manufactured by another American company,Sydney Commercial Furniture
ReplyDelete