upcycled ...from a coffee table
It was just an idea.
 |
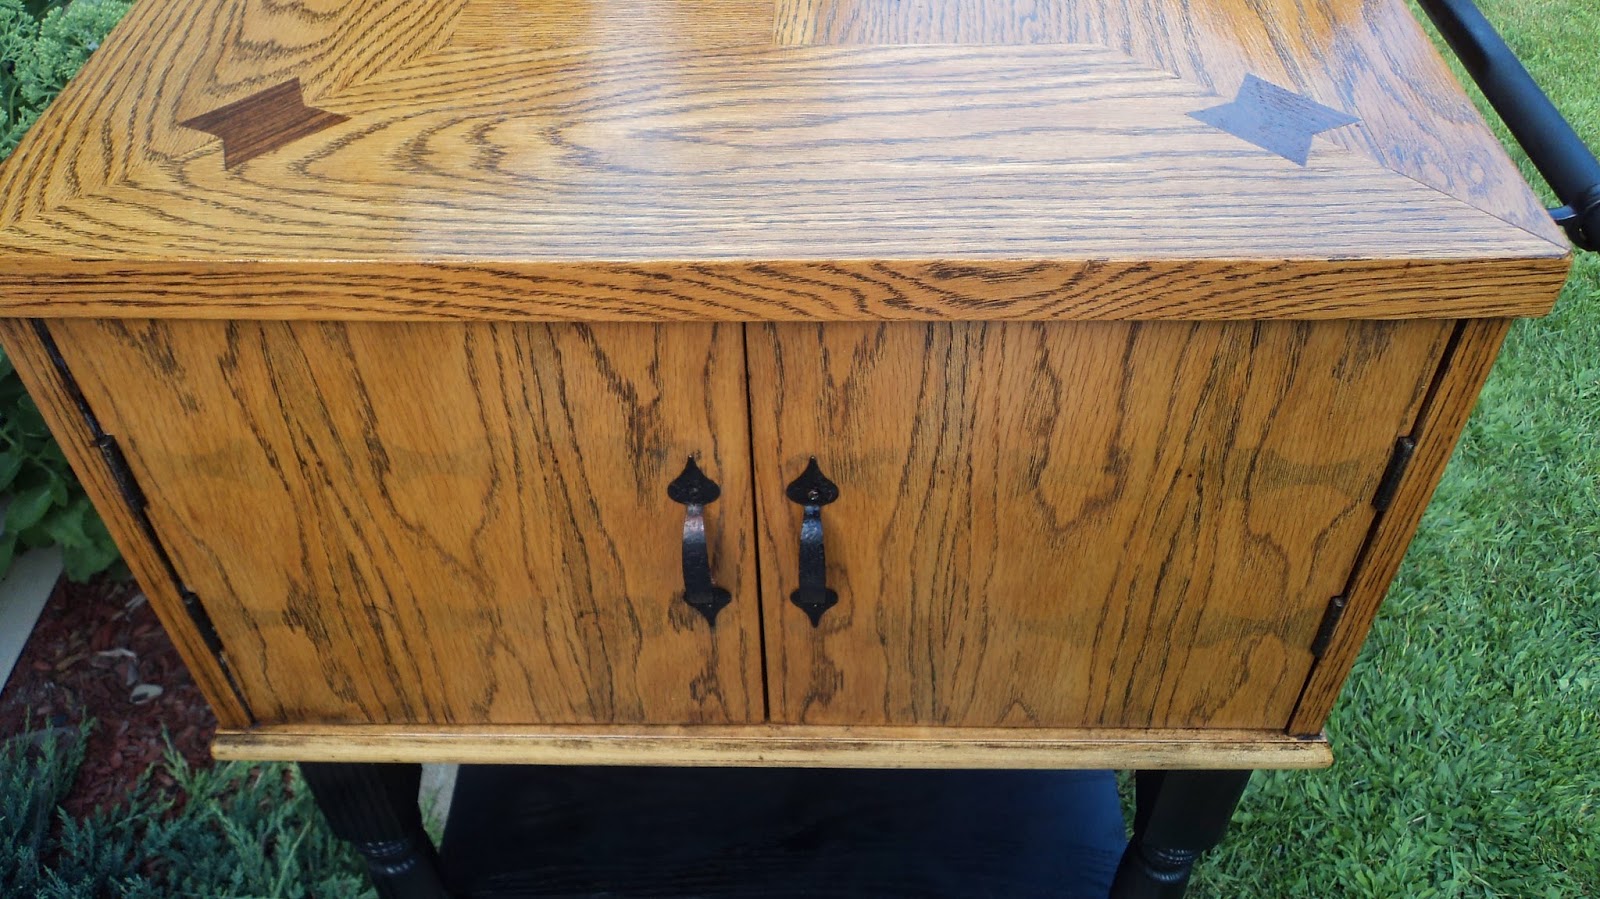
I bought this coffee table from a thrift store for $45 and used it as a side table in between two large recliners. It was perfect for storing throw blankets. I refinished it in this lighter golden oak because the former finish was as dark as the walnut inlays. The walnut didn't show through as dramatically.
Since then, I revamped new "old" furniture for the living room and this had to go. |
The table is a good solid piece with great space and storage. Someone will want it.
 |
| I never liked the steel feet on it and intended to change them at some point. |
 |
| In fact I disliked them even more after breaking and splitting my toe on the corner of this piece just prior to this photo last week. I ran into it with bare feet. |
 |
I had a photo of my older son making an apple pie at an old porcelain top oak cabinet when he was young. His fiancee saw it and claimed she wanted an island for their small country kitchen. She said they were going to invest in one. I told her, "No don't! I've got something just the right size and I'll make you one!"
|
 |
I set up for the materials to build a base for the table. She wanted it on castor wheels and it had to have a towel rack.
4- 24" prefabbed turned legs
4- castor wheels
4- leg plates
2- round curtain rod brackets
8'- 3/4" dowels for leg supports
6' 6"x 3/4" oak board
2- hammered barn style door handles
Wood screws
Black paint/stain
Woodglue
|
 |
| I painted the legs and attached them with the leg plates in each corner. Then cut my dowels for leg support. |
 |
| Drilled for the dowels at 7" from the bottom. |
 |
Added the leg braces without gluing yet.
|
 |
| Drilled holes for the wheels |
 |
| Inserted the castors |
 |
| Mounted the curtain rod brackets and painted another dowel for the towel rack. |
 |
| Painted two copper handles black ( to match the handles on their kitchen cabinets). Cut a six foot oak board into three 24" pieces for slat shelving. |
 |
| Glued in the dowels for leg supports and held with a ratchet tie down while drilling pilot holes for the shelving. Then used screws to attach the boards from the bottom of the dowels. |
 |
| After the glue dried, painted the boards and giving the corner joints complete coverage. |
 |
| The towel rack makes a great handle to glide the island on its wheels. |
 |
| I did nothing to the original interior. (Sporting the color the exterior used to be). |
 |
| I decided my son could use this large basket to hold his garden veggies on the shelf area while he cooks. |
 |
| So I trimmed and hot glued the frayed areas. Sanded the entire basket, stained and clear coated it. The stain was the same warm Golden Oak that I did the coffee table in 5 years ago. |
 |
| And they go together well. |
 |
| Sporting my own kitchen attire, this baby is ready to rock and roll at my son's house. |
 |
I can see him making his pizzas and other creations on this space while singing.
|
 |
And his whole family will be happy. Danzig, the big guy in the back, first rescue dog who is a ball and swim athlete, and there is Miller, the three legged pup, baby of the family, getting all of his mom's attention. ( yes Dan is giving the "really" look)
|
 |
| His garden veggies will have a great spot here instead of on the countertop. |
.jpg) |
| Having a "butcher shop block" look to it, the size and shape is perfect for the knotty pine kitchen they have. |
~~~~~~~~~~~~~~~~~~~~~~~~~~~~~~~~~~~~~~~~~~~~~~~~~~~~~~~~~~~~~~~~~~~~~~
 |
| With Debra |
|
| With Carole |
 |
| August Welcome Wagon |
Wow Us Wednesday


+(1).jpg)


This is so clever. I love how it turned out! Love from Bacon Time.
ReplyDeleteI think I used to have a sidetable just like that. Such a simple update but it really is great. Hope his fiancee really appreciates all the work you put in.
ReplyDeleteSuch a great use for this old table. Thank you for sharing it at the Merry Monday Linky Party
ReplyDeleteThis is a nice piece. You really transformed it :) Thanks for sharing! And, thanks for linking up at Together on Tuesdays!
ReplyDeleteIt is a heavy and well made piece. I kind of hated to let it go after putting it to good use myself, but when the island idea popped up, it was perfect to use.
ReplyDeleteThanks so much for visiting Sandy :)
She loves it. Something as simple as a base on a piece is certainly an idea to keep in mind.
ReplyDeleteThank you so much, Mindie! oxox
ReplyDeleteYou are welcome! Thank you for having me and stopping by!
ReplyDeleteStopping in from Whatever Wednesday Blog Hop. I'm not always a furniture makeover fan (Sometimes they are... shall we say, not an improvement?) But I LOVE this. It's a perfect country island! I need to do something similar for the weird little bumpout corner in my dining room. It's got a cart there but it's really too big for the space. I keep watching for something that's the right size. Thanks for the inspiration!
ReplyDeleteThat is GORGEOUS! I need to get myself some tools and upcycle some of my stuff!
ReplyDeleteYou're welcome! Maybe watch for an end table that you can raise with legs and castors. I bought the legs, but snagging legs from a table would work too. I'd love to see what you do!
ReplyDeleteBe careful... it could become addicting! LOL Have fun!
ReplyDeleteLove this upcycle! Thanks for linking up to Your Design This Time :)
ReplyDeleteWow, what a terrific transformation. Love it! Hugs. P.S. I invite you to share your post at my blog hop ( link up tonight through Sat)
ReplyDeleteThis is too awesomely cool! I love how folks can take something and make it into something else entirely. The "new" item is gorgeous.
ReplyDeleteOH my goodness I am so sorry you hurt your toe in the process of finishing the project!! But it looks amazing!!
ReplyDeleteThanks for linking up at the Bewitchin Projects party this week! I can't wait to see what you link up again next week over at OurMiniFamily.com!
Cheers,
~Cathy Mini~
OurMiniFamily.com
Gorgeous!! That is not just an upcycle, that is perfection! Love it. Couldn't we all use one of those? Thanks for sharing!
ReplyDeleteWow! You have taken DIY to a whole new level. What a talent to have seen such a piece in the beginnings of something so different! Robin, thank you for sharing with us this morning at the #SHINEBlogHop - so glad to have found your site. It's so full of crafty inspiration (although I'm not as handy with the power tools as you are)! Sarah from Ruffles and Rain Boots
ReplyDeleteGreat idea and upcycle! Just pinned to the Fridays Unfolded link board and thanks for sharing at Fridays Unfolded!
ReplyDeleteAlison
Nancherrow
Love how this turned out! I don't think I would ever guess that it was originally a coffee table. You did a beautiful job.
ReplyDeleteThanks for sharing at last week's Weekend Wind-Down party and for linking back to us! I will be featuring this post on this week's party. You can come to the blog Friday at 6pm to see the feature, grab a button, and link up new posts! Thanks for giving us great content to feature. =)
Nicole
nicoleslifeafter20.blogspot.com
This is awesome! I would never have thought of this. Thanks for sharing with Creative Spark Link Party.
ReplyDeleteGlenna @ My Paper Craze
Now that is a FABULOUS transformation! Well done and great job with the tutorial!
ReplyDeletePinning! Thanks so much for sharing on Show-Licious!
~ Ashley
I love this! Now to try and find a table at a thrift store that will work for this. Pinning for later.
ReplyDeleteYou are so talented! This is beautiful and functional! Thanks for sharing with the Thursday Blog Hop!
ReplyDeleteWhaaaaaaaaaaaaat?! That's pure genius there! I have been wanting a kitchen island... I'm so excited now to make my own like this! :o)
ReplyDeleteTania
Thanks, Bre! :)
ReplyDeleteHappy to be there, thanks so much, Katherine!
ReplyDeleteI'm healing well! :) Thank you for everything, Cathy~ Can't wait to see the next party!
ReplyDeleteLet me join everyone else is saying your kitchen island is genius!!!! I love that you repurposed your end table into something fabulous. I hope your future daughter-in-law loves it too. Because your kitchen island is so terrific, we are featuring it on Share It Sunday link party this week.
ReplyDeleteI love this! The old girl looks so much happier with long legs :). I never would have guessed this used to be a coffee table, you did a fantastic job!
ReplyDeleteThis is another great project - I love your ideas, this would also make a great art stand - storage for supplies and a place to create. You're being featured again this week at Garden Up green on Tuesdays with a Twist. Be sure to stop by and link up your feature. Carole @ Garden Up Green
ReplyDeleteLove this!! Thanks for linking up with the Caffeinated Crafters last week! We loved having you!!
ReplyDeleteThanks, April ox
ReplyDeleteYou betcha! I always have to use an island. They are too convenient. Thanks, Elizabeth!
ReplyDeleteI'm so stoked you like my site! Thanks so much, Sarah!
ReplyDeleteI really appreciate the pin, Alison! ox
ReplyDeleteI am so impressed with your vision! I would have NEVER thought to make this a kitchen island...what a great MIL! ; )
ReplyDeleteThanks for sharing on Hump Day Happenings!
I love that this was re-used, I will be featuring this post tomorrow at Tuesdays with a Twist link party on my blog, come by and check it out. Thanks again and have a great week.
ReplyDeleteThis looks awesome! I wish I had the talent to remake a coffee table:) Have a couple in the shed I was going to pass on to the Helping Hands Center but I think I might hold on to them and create something else!
ReplyDeleteThanks for sharing this at the Teach Me Tuesday Linky Party last week. I hope you can join us again tonight starting @ 9pm est!
You did a great job upcycling that table. So creative. Thanks for sharing at #theWeekendSocial. Hope to see you again on Thursday 9:00 PM EST. Pinned as well!
ReplyDeleteSuper Cute! I shared it in my latest roundup and features on my blog today:
ReplyDeletehttp://www.avisiontoremember.com/2014/08/decorating-on-budget-ideas-plus.html
Thanks again for linking up to the Creative Exchange link party! Hope to see you again this thursday!
Sah-weeeet! Thank you so much, Nicole! :)
ReplyDeleteThank you for everything, Robin! ox
ReplyDeleteYou're welcome! Thanks for the invite :)
ReplyDeleteYay! Thanks for the visit and the pin!!!!
ReplyDeleteI can't wait to see yours, Jennifer! That is so exciting!
ReplyDeleteYou are a sweetheart! Thank you :)
ReplyDeleteYes! Please do and share it with us!!!!
ReplyDeleteAwesome job! I love how you contrasted the black with the lighter stain. Beautiful!
ReplyDeleteHa! I bet he could do this very easily! Thank you so much for sharing with your parents. I hope it works well for them! :)
ReplyDeleteYou rock! Yes, she does love it and I'm so glad it works for them.
ReplyDeleteThank you, Michele! <3
It is much better this way than what it used to be. :)
ReplyDeleteThank you so much!
Thanks for having me! :)
ReplyDeleteIt would; great idea, Carole! I'm so excited about the feature! Thanks so much~
ReplyDeleteYou're sweet! Thanks for visiting!
ReplyDeleteI'm so thrilled! I will be there! Thank you!
ReplyDeleteThanks for the Pin! <3
ReplyDeleteYou're such a sweetheart! Thank you, Bobbie ox
ReplyDeleteLOL! Get your own tools and go for it, girl! I don't let my hubby touch my tools, well he can but I make sure he puts them back where he found them. ;)
ReplyDeleteI'll be by, thrilled with the feature! Thanks so much, Allie ox
I like it contrasted too. Originally, I was going to go all wood stain, but the legs aren't oak. The shelf boards are, which would have made the woods look really "off". To balance the piece, the entire base ended up painted.
ReplyDeleteI'm so glad you stopped by! Thank you!
Oh, wow! Thank you, Michelle! :) I'll be stopping in, as usual!
ReplyDeleteLove this! I am featuring it on That's Fresh Friday this weekend. Thanks so much for linking up. Have a great weekend!
ReplyDeleteThrilled to death! Thank you, Kathy, I'll be stopping back :)
ReplyDeleteYou never cease to amaze me. What an ingenious idea! Thanks for sharing with Pin Your Friday Favorite!
ReplyDeleteAw, shucks, Nicki, thank you so much! :)
ReplyDeleteHi Anne! Thank you and have a great weekend!
ReplyDeleteAwesome Kitchen Island! You were featured in Pin Your Friday Favorite on my blog!
ReplyDeleteSO thrilled! Thanks Trine! :D
ReplyDeleteThis is beautiful! I can imagine your future daughter-in-law is going to treasure this over the years.
ReplyDeleteThanks for sharing this with us in the BLoggers Brags Pinterest Party!
This is a great Idea! You can really bteathe new life into anything!
ReplyDeleteThanks, Rebekah! It pleases me that she loves it. Thanks for having me~
ReplyDeleteAw, thank you! :)
ReplyDeleteThanks for linking up on Two Uses Tuesday! I love upcycled furniture and this turned out beautiful. BTW, love the pup picks in the middle of it all =)
ReplyDeleteI'm so thrilled you stopped with such a kind visit! Glad you like my grandpuppies too! =)
ReplyDeleteThank you for the lovely link up! Happy Thanksgiving!