Showing posts with label kitchen decor. Show all posts

Friday, August 19, 2016

Affordable Farmhouse Decor


It's time for some farmhouse fun! I love to scout around finding amazing deals for farmhouse decor that I can't make myself. With that, I'm excited to share them with you!

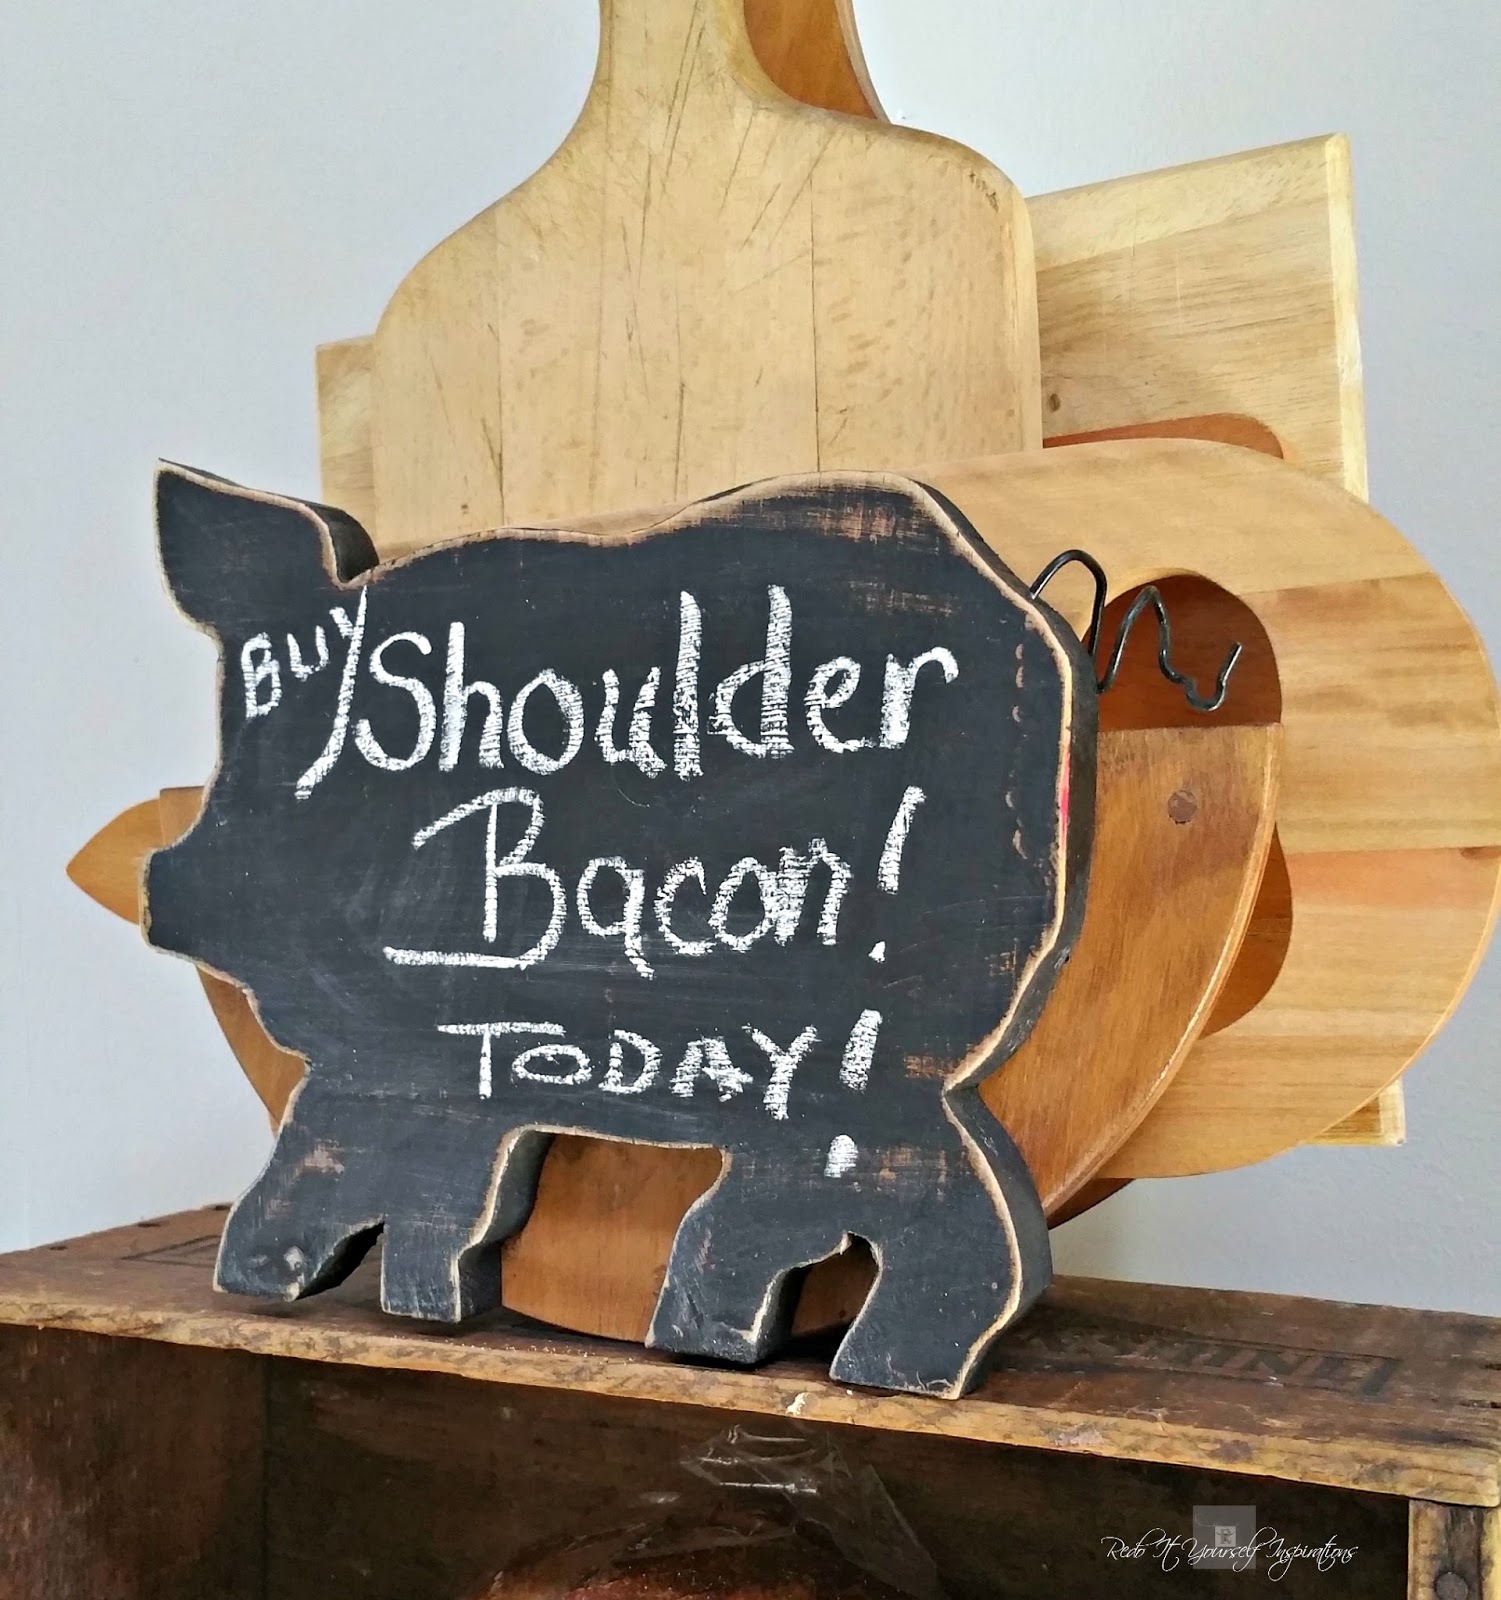
I bought this chalkboard pig and love how I can write anything on it to be functional or leave it plain as an accent piece. It's a good size, measuring 12L x 7.25H x 4.5W and it looks cute peeking from the shelf ledge or on the countertop as a memo board. 


I have included a link below, (affiliate) in case you want one too. I also discovered several other affordable items that would add a nice touch of farmhouse style around the house. 

Rustic Windmill Wall Clock


Mason's Jars Salt and Pepper Caddy with Wood Handle

(So stinkin' cute!!!! This is on my wishlist!)


Boxwood Wreath - 14" Round

(indoor or outdoor use!!!)


Classic Kitchen Towels, Pack of 15, 14 x 25-Inch, 

White with Blue Stripe

(15 pack!!!! Yesssss!)

Ceramic Berry Containers 3 Assorted - 3.5" x 4.5"

(Awesome for the fridge!!!)


8 Piece Mason Jar Drink Dispenser Set With Stand

(love the wide mouth for easy cleaning!)


Resin Chalkboard Pig 

(this is the guy I bought!)


Farmhouse Chicken Wire Baskets

(love these!)


Dozen Wooden Chicken Faux Eggs 

(perfect for the baskets)


Vintage Home Metal Jar - Set of 3

Aren't they all fun???? I love this stuff! 

For more product information and quick ordering, click on the  (affiliate) links below. You can read my full disclosure > here<.


Thursday, March 31, 2016

Farm Style Cutting Board Holder


It's time for another DIY Blogger Project Challenge!
Each month we have a different project to create based on a named material theme. This month it's chalkboard paint!


Today I'm sharing another repurposed thrift shop find. Remember those vintage wooden paper plate holders? I snagged one! It reminds me of a breadboard, so I thought it could be converted into a cutting board holder. Something I need to keep my breadboards and cutting boards from slipping on the counter top. 


There were 2 problems with it.

1: The fact it was round and if I wanted to use it on the counter, it would roll from side to side.  To stabilize it, a piece of wood could hold it upright. And that's where my chalkboard theme comes in. I chose to use a wood farm animal shape as a chalkboard; mounted onto the front of the holder.

2. There were two dowels in the way of putting bread boards and cutting boards into the holder. So I cut them off with a coping saw.

While the front was still open, I drilled holes to attach my pig chalkboard when it was finished.


To make the pig chalkboard, I reclaimed some wood from my scrap box and drew the pig outline with chalk.

See that... a chalk board!
Ok, I'm joking!

It was the best way to see my overall pig shape before cutting it out with the scroll saw. It's forgiving this way. Easy to draw and erase with a towel to get it just right.


Once I cut it out, I sanded it and painted it with the chalkboard paint.

Of course, a pig must have a cute little curly tail. So, I drilled a hole for the tail.
Then, using a wire clothing hanger, I snipped off a piece of it and twisted it with two pairs of pliers.
To attach it, I dropped super glue into the drilled hole and placed the curly tail into it.
After the glue set, I painted the wire tail.
Finally, attached the chalkboard onto the plate holder with screws... well, board holder now. And sanded the edges of the pig all the way around for a nice old distressed look.


Because I left the original drilled holes for hanging, the board holder can be wall mounted.


Or, the way I prefer, sitting on the table or countertop.


It has plenty of room to fit all of my boards. 


And because it has no height or width restriction, any size board can slide in place.


As a chalkboard... kitchen reminders can be written on it. After all, some things are too important to forget!


What is nice about the original back on this is... it looks like another breadboard. It just blends right in. 

vintage paper plate holder

I'm already glad this is keeping my boards in place and wonder why I never thought of it before!


If you like farmhouse style, this is a pretty handy "two-in-one" kitchen gadget!


Featured at


Our Mini Linky Party

I hope you enjoyed this repurpose idea and will check out the rest of our chalkboard paint projects below! 

All of the DIY Project Bloggers have prepared some amazing posts for you this month!


Sunday, May 24, 2015

Salvaged Cornice Brackets


My mom had these old brackets in her stash and when she learned that I love them, she gave them to me.  I honestly didn't know what to do with them and didn't want them just stuffed somewhere. Nor did I have a designated place for them in the house. 

That was until I looked at my boring archway between the kitchen and the dining room. HA! 

Layers of cracked paint were flecking off. Without removing all of the paint, I just scraped off and lightly sanded them to leave the aged characteristics of them. 

This little washer was a great help getting into the rounded areas. 


When most of the loose stuff was removed. I was ready to hang them.


I added picture hanging brackets to the backs for easy hooking.


Using nails to hang them up, I was so excited to get great use of these awesome old architectural pieces! 


I'm thinking... I can make similar brackets to do the same thing between the dining room and the living-room because we have a huge archway there as well.

What would you do with old cornice brackets? I'd love them outside the house too, but we don't have the frame work for them anywhere. (yet, anyway)


~~~~~~~~~~~~~~~~~~~~~~~~~~~~~

Proudly featured at


Monday, March 23, 2015

Decorated Garlic Infused Oil Bottle & Recipe


I cook with garlic-infused olive oil quite often. It's healthy, tasty and ... expensive.

Making it yourself can save a lot... to buy... more garlic and olive oil. It's so beneficial cooking with it and it's a big budget helper. It takes just 6 smashed cloves of garlic to one cup of olive oil.

I confess, I've bought the pre-made infused oils and vinegar off the shelf; but only on sale.


I saved the used bottles to hold my own home-made. I opted to change the look of the plain "what is in that?" bottle by decorating it.

Cradling the bottle with rolled towels I drew an outline of a head of garlic in permanent marker.


Then painted it.


Still somewhat plain and too simple... I chose some decorative writing from this stencil by The Crafter's Workshop "Grow" # TCW 531S.


I sprayed adhesive on the stencil and wrapped it firmly onto the bottle while applying a green iridescent embossing paste.


The little design became a visual label for what's stored inside.


Super easy and quick little bottle dress up! I'll do this for the infused vinegar recipes too!


Do you make your own infused olive oils?


I'm updating the post to for the requested recipe I use! :)


Garlic Infused Olive Oil

Ingredients: 

(Stove top simmer method) 
6 Cloves of Garlic to 1 Cup of Olive Oil

First, use high quality olive oil. Getting it on sale can help keep the cost down.
Second, the garlic needs to be cooked to remove bacteria and the threat of botulism.

Start by peeling and chopping garlic, then add some oil in a pan to saute the garlic with medium heat for about 5 minutes. A steady sizzle without browning will avoid bitterness. Lower heat to medium low and add cup(s) of oil to infuse, allowing a slow light boiling of the oil for another 5 minutes. Make certain it doesn't burn. Lower heat to low and simmer 15 minutes. (This is to ensure any health threatening spores are killed.) Turn off the heat and allow the oil and garlic to cool.

Once cooled, strain the entire contents into an airtight container, making sure no garlic pieces are in the oil. (Any remnants could spoil the oil.) Store the oil in the refrigerator for use. It lasts quite a long time chilled.

(Tip: Those cooked garlic pieces can be used in a recipe right away! I like to make a garlic herb butter for hard crusted bread to use it up... Garlic bread goes great with many main entrees!)


(Slow cooker method)
1 Head of Garlic to 1 cup of Olive Oil

You can leave the skin on using this method, and I do, to hold the cloves together. I cut the heads in half and put them into the cooker using high heat the first hour, then medium heat for another 5 hours. This allows the natural garlic oil and it's healthy benefits to release into the olive oil while killing bacteria.

Shut off the cooker and allow the oil to cool. Strain well into airtight bottles/containers. I've stored this method in a bottle in my cooking cubby up to a week without any health risks. (It usually gets used up within that time period.) You can refrigerate or store in a handy place for cooking.


Garlic Infused Vinegar

Ingredients: 

6 Cloves of Garlic to 1 Cup of Vinegar


Garlic infused vinegar is a lot easier! Because vinegar is acidic, it kills the bacteria spores in garlic and you can simply add the cloves into it. White or apple vinegar gives the best garlic infused flavor, but I've used it in wine vinegar too.

Peel the garlic and smash it to release the oil and drop into your container. Or you can use a wooden skewer to put through the cloves and push it into a bottle. Pour vinegar in and that's it!

You can leave the cloves in as long as you wish. The longer the better without bitterness. As you use the contents, just add more vinegar to top it off. It lasts a very long time.  If the garlic changes color, it's normal, and nothing is wrong. It's a pickling process. (You can remove the garlic and start with another batch anytime.)

(Tip: The pickled garlic can be eaten... add it to a salad vinaigrette!) 


The initial cost of the ingredients for the oil and vinegar recipes can equal the cost to ONE or TWO prepared store bought. The savings is huge and you can control the flavor you desire.


~~~~~~~~~~~~~~~~~~~~~~~~~~~~~~~~~~~~~~~~