


Welcome to the 2016 Ornament Exchange & Blog Hop!
This year, there are 11 pairs of partners, or 22 talented ladies, participating in the exchange.
The rules of the challenge were simple - create a handmade ornament for under $15 to exchange with a partner and create a tutorial to share on the blog hop.
I've been paired with a creative blogging friend, Michelle, over at "Our Crafty Mom" and here I'm introducing all of the exchanging hostesses!

Shirley · Intelligent Domesticatons Michelle · Our Crafty Mom
Robin ·Redo It Yourself Inspirations Sherry · Olives-n-Okra
Kati · Houseful of Handmade Beverly · Across the Blvd.
Jeanie · Create and Babble Erin · Suburban Simplicity
Terri · Christmas Tree Lane Maureen · Red Cottage Chronicles
Debra · Shoppe No. 5 Donna · Two Chicks and A Mom
Pamela · Home On The Corner
I saw Michelle's beautiful wreath that she recently made and it gave me a clue as to what her theme is for Christmas this year. It's a glamourous woodland theme. Isn't it beautiful? I adore the colors. That copper is gorgeous.

I thought it would be fitting to send her some nature from my neck of the "woods".
So I gathered some black walnuts from outdoors. (I know, they don't look wonderful in their original state.)

And after opening them, I'm exposing how really awful they are.

The black walnut has many uses besides cooking and baking. That dark muck causes deep stains. It's used by many to dye felt and other textiles. It's been known for medicinal purposes as well. So black walnuts are a really great natural resource.
Because the nuts had a lot of gunk on them, I simmered and stirred them in soapy water on the stove to loosen it off. The water instantly turned a dark coffee color. (I reserved it to dye some rope for another project coming here in a few weeks.)

After getting the muck loose, I put the nuts in the oven at a low temperature to dry the remaining black gunk. (100 degrees fahrenheit, for about 2 hours)

Then I brushed off as much of the dried remnants that I could with a wire brush.

As you can see that stuff likes to cling in the crevices.

The outside of the shell has sharp ridges, so I sanded the nuts smooth with the table sander.

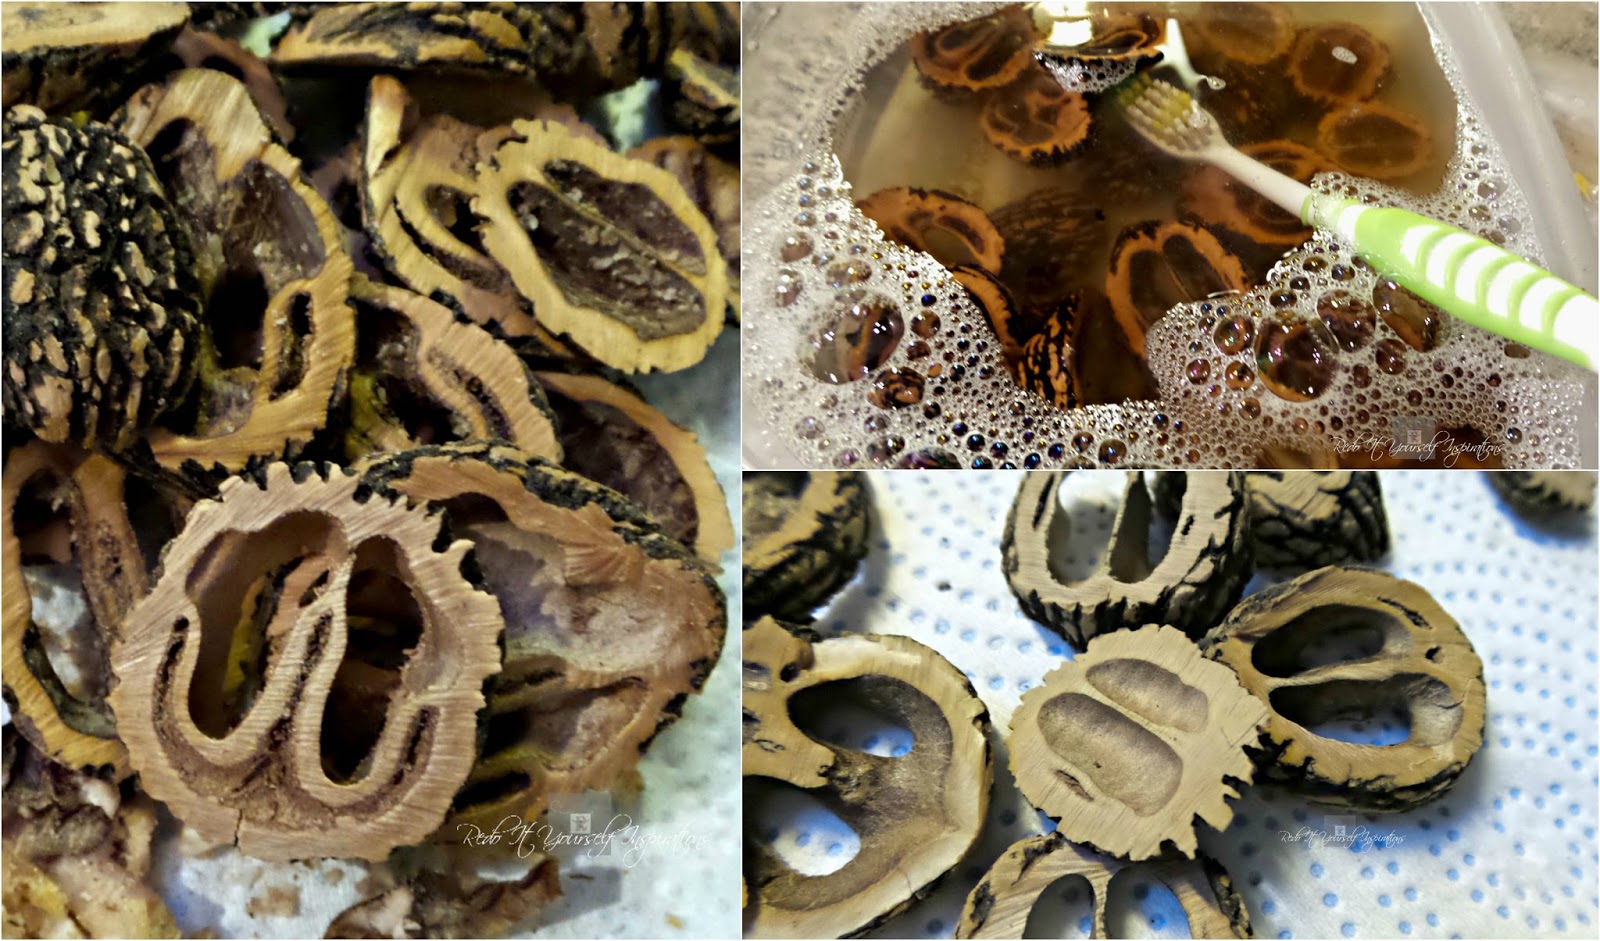
Then sliced the nuts with the band saw. (Scrollsaws work too, but not as easily as a band saw. That tool is the most used in my shop and I'm going to provide some tips about it. Look for my Tool Guide coming soon.)

Now the time consuming part... removing the nut meat and cleaning the inside of the shells. I used nut picks and a dental pick, then followed up with a toothbrush and hot soapy water. After that, I let them air dry on paper towels.
Finally, the creating part! I have made these before, a few decades ago actually, and learned that they needed to be more secure than I have previously done them.
So I hot glued a wreath shape from the nutshell slices, then drilled tiny holes to feed and tie them together with wire.

To hide the security, I added the end cuts from the shells over each wired area with an ape strength super glue... and that built up the look of the wreath.
But, I was also adding a copper color pine cone inside the wreath, so it needed a hanging spot. By twisting a piece of wire, I made a loop for hanging the ornament while attaching the pine cone hanger piece.

After the wreath was built, I used a polycrylic to coat the nutshells... and wish that I hadn't. The glue I used reacted to it and turned white. It's a good thing it only shows on the back of the wreath. Next time, I'll use real polyurethane as I have in the past. (Always learning.) The reason I opted for the polycrylic, was fast drying and no aroma for shipping purposes.
Anyway, I added a shiny satin ribbon and wove it through the nutshell slices. Then, attached the copper pine cone.

For some "bling" I hot glued two golden styrofoam sprigs at the bow.

Finished!

Ready to hang.

I thought sending Michelle a little bit of grown in "New York" nature might fit into her woodland decor.


It's woodsy and glammy at the same time.

Hope she likes it!

Thank you for visiting!

I hope you enjoy everyone's ornament crafts linked below and find some that you will want to do. Happy creating!

FIND MORE HANDMADE ORNAMENT TUTORIALS BELOW AND SHARE YOURS TOO! Be sure to use our tags to share the fun! #2016OrnamentExchange and #2016OrnamentExchangeBH


No comments:
Post a Comment