Showing posts with label Cardboard Crafts. Show all posts

Monday, February 23, 2015

St. Patrick's Day Door Hanger - Wall Plaque


I picked up this cardboard Celtic Cross at the Dollar Tree Store. I thought it was very pretty but not hefty enough for the front door.


Since it's cardboard recycle and re-purposing month over at Creative Craft Challenge, I decided to use these Valentine hearts to create a large clover to add to the cross.


To cover the Valentines and make them green, I considered painting, or gluing some paper, or fabrics, ribbons; anything as long as it was green.  I remembered having some greenery stashed from Christmas decorating, so I grabbed them. Having the idea to cut the leaves and decoupage them onto the hearts, aha! Clovers are leaves and so are these! Perfect color and texture. Green floral tape was another idea, but I didn't have enough to cover all three hearts.


I found it was best to apply the glue right on the back of the leaves to adhere well.


To start the project, I cut the leaves into individual pieces and glued them onto the edge of the hearts. Overlapping to fold over the sides for good coverage. 


Once I covered the hearts with leaves, I painted on Mod Podge over the entire surface and the overlapped sides.


Once the leaves were dried on, I used the green floral tape to cover the sides of the hearts. It was best to start it with a staple to hold it in place.


Using glue and wrapping on the green tape,


it covered nicely.


Then I covered the tape wrapping with Mod Podge. 


After it dried, I super glued the points of the hearts together.


Then super glued the cross centered over the glued hearts.


My cordless drill was the perfect size and weight to hold the work together while it dried.


Then, I stapled on the ribbon, that was originally on the cross, to the top of the newly created clover.


The bottom of the cross is now the stem. A Shamrock is born!


A nice large Trinity decoration is made and it's as solid as a Blarney stone!


And, it fits the door window perfectly!

Between the one dollar for the cross and the items on hand, this door hanger cost was ...


only $1.00...!


 Happy St. Patrick's Day!

~~~~~~~~~~~~~~~~~~~~~~~~~~~~~~~~~~~~~~~~~~~~~~~~~~~~~~~~~~~~~~~~~~~~~~~~~~~

Proudly sharing as Guest Post for Kenarry: Ideas for the Home.


FUNTASTIC FRIDAY #13


Wednesday, February 4, 2015

Easy Cardboard Letters


During this month's Craft Challenge, we are coming up with many ideas to recycle cardboard. I made cardboard drawers and had these flaps leftover to use. 


Ha! I love letter decor and needed a pop of red in my kitchen so I decided to hang up the word "EAT".  This is just too easy peasy! 


I drew on the letters. 


Then cut them out. 


Wanting a layered distressed look, I started painting the first layer with a turquoise blue.


When it dried, I applied a layer of red paint. 


Well I never sanded cardboard before but gave it a try. It worked.


I hung the lightweight letters on the wall with two-sided tape. 


This is so easy, my son can make them... for me... for every room that I want to express a word! 
Can you believe it?!?! 


Just what the island needed... a pop of red! 


What are you doing with your leftover cardboard? Recycle with decor? There are so many options! 


~~~~~~~~~~~~~~~~~~~~~~~~~~~~~~~~~~~~~~~~~~~~~~~~~~~~~~~~~~~~~~


Featured


Craft Challenge: Cardboard Boxes into Crafty Drawers


Our Craft Challenge team is sharing their craft of the month which is cardboard themed. My first attempt was a recycled shoebox into a decorated storage box. Not as creative as I'd like, so I decided to add a couple more.

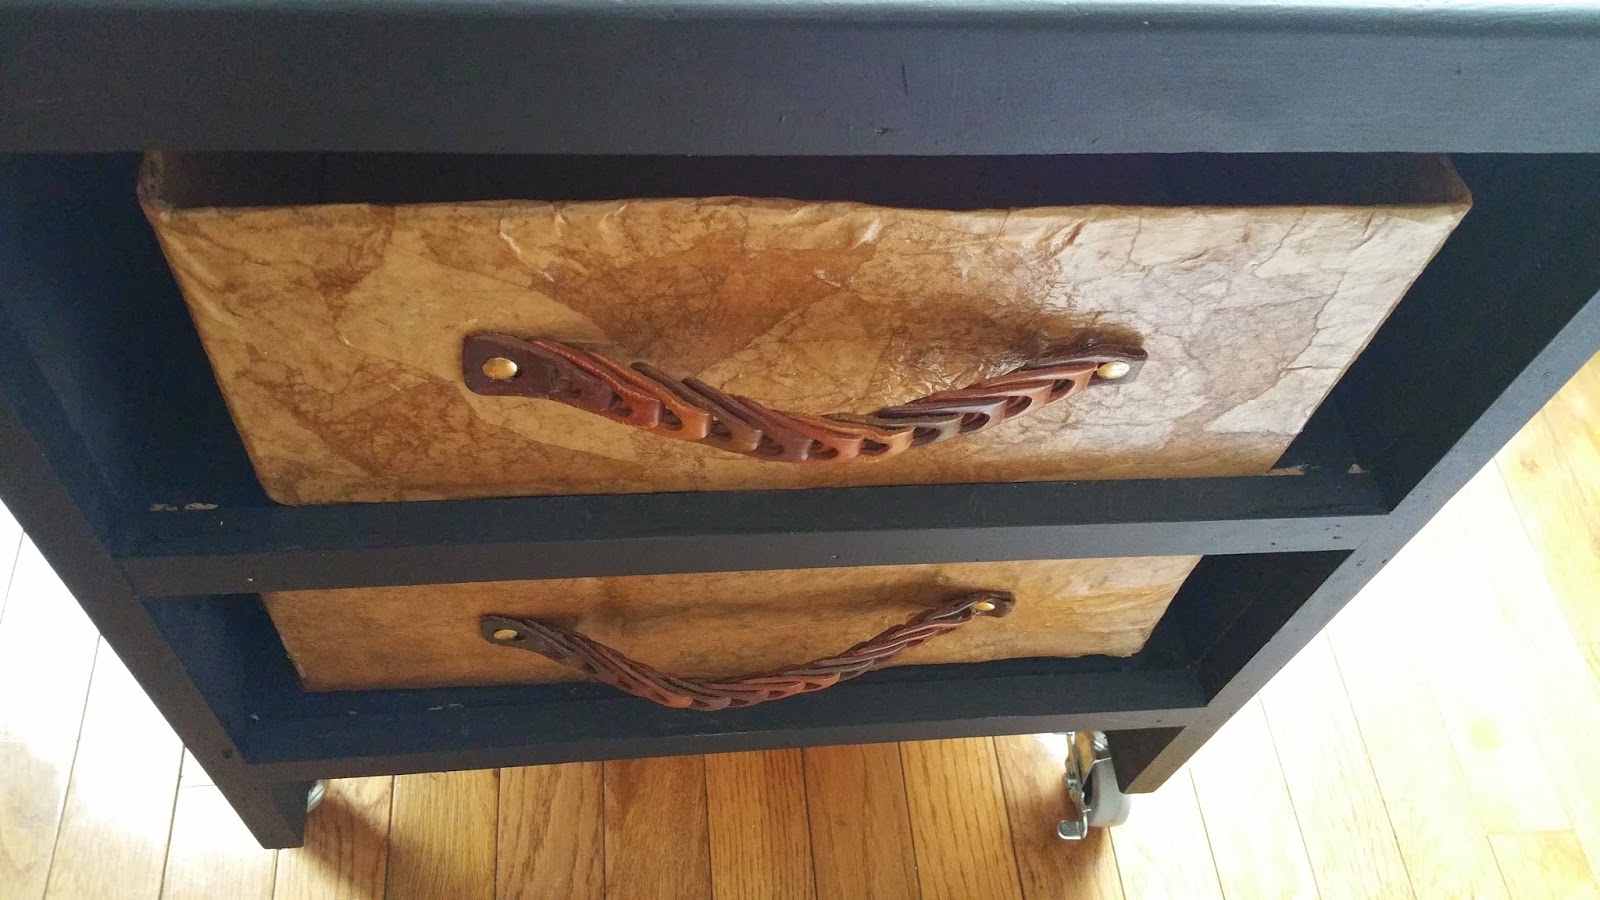
This one started with a little side table and a shipping box. I wanted to turn this into a storage unit for my birds. It would be great for their treats, food and toys. 


But my birds are messy so putting the unit on wheels for easy sweeping and cleaning was the first task. I chose the braking type wheels for safety reasons. The birds could perch on the table top for window watching. 


I drilled the holes to screw in the caster wheels into the corners of the bottom of the table.  Once that was finished, it was nice to spin the table while painting with them attached. 


I took an ordinary shipping box that fit into the shelving area of the table,


and removed the flaps; cutting them off with scissors. 


Then I tore up paper bags and decoupaged the pieces onto the face of the cardboard box to decorate as a textured covering. 


Setting aside to dry, I started on the second drawer for the table. I wanted a divided drawer, so I used soda can boxes. 


Simply cutting down the center of the top of the boxes and folding the cut parts over,


and taping onto the sides, created strength to the dividers. Then I taped three of the cut and taped boxes together with duct tape. 


I used another box and cut out a bottom for the 3 taped boxes for more strength. 


Using torn paper bags I decoupaged the entire divider drawer. 


I chose this leather belt to cut up for handles. 


After selecting and cutting the belt to the size I wanted, I attached the handles with super glue, thumb tacks pushed through the cardboard and bent over with pliers. 


Set them to dry thoroughly. 


Then placed them into the shelving areas. 


This is a lot neater than using baskets under the bird cages! 


Have you recycled cardboard? What have you made? Would love to see your ideas! 


~~~~~~~~~~~~~~~~~~~~~~~~~~~~~~~~~~~~~~~~~~~~~~~~~~~~~~~~~~~~~~~~~~~~


Featured at