Showing posts with label nature crafts. Show all posts

Friday, November 11, 2016

Walnut Shell Wreath and the 2016 Ornament Exchange


Welcome to the 2016 Ornament Exchange & Blog Hop! 
This year, there are 11 pairs of partners, or 22 talented ladies, participating in the exchange.

The rules of the challenge were simple - create a handmade ornament for under $15 to exchange with a partner and create a tutorial to share on the blog hop.

I've been paired with a creative blogging friend, Michelle, over at "Our Crafty Mom" and here I'm introducing all of the exchanging hostesses!


Erlene ⋅ My Pinterventures   Kim · Made In A Day  Amanda · The Kolb Corner
Shirley · Intelligent Domesticatons  Michelle · Our Crafty Mom
Nicki · Sweet Parrish Place   Sherry · Savvy Apron   Megan · C'mon Get Crafty
Jelica · A Pretty Fix   Emily · Two Purple Couches   Christene · Keys to Inspiration
Kati · Houseful of Handmade   Beverly · Across the Blvd.
Jeanie · Create and Babble   Erin · Suburban Simplicity
Debra · Shoppe No. 5   Donna · Two Chicks and A Mom
Pamela · Home On The Corner

          I saw Michelle's beautiful wreath that she recently made and it gave me a clue as to what her theme is for Christmas this year. It's a glamourous woodland theme. Isn't it beautiful? I adore the colors. That copper is gorgeous. 


I thought it would be fitting to send her some nature from my neck of the "woods".

So I gathered some black walnuts from outdoors. (I know, they don't look wonderful in their original state.)


And after opening them, I'm exposing how really awful they are.


The black walnut has many uses besides cooking and baking. That dark muck causes deep stains. It's used by many to dye felt and other textiles. It's been known for medicinal purposes as well. So black walnuts are a really great natural resource.

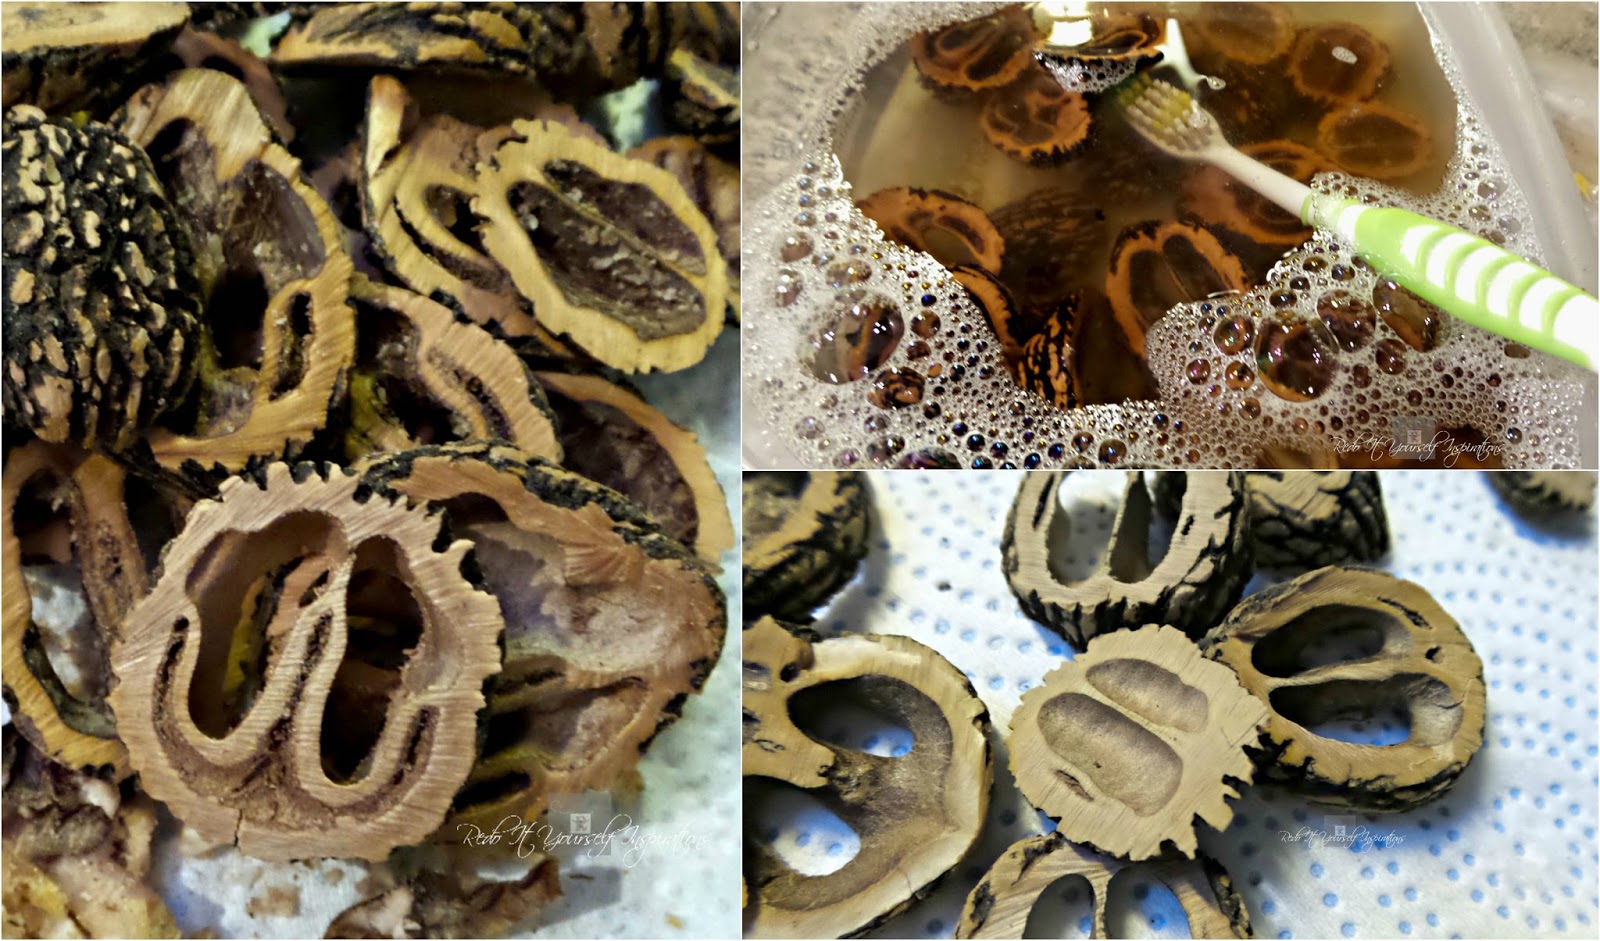
Because the nuts had a lot of gunk on them, I simmered and stirred them in soapy water on the stove to loosen it off. The water instantly turned a dark coffee color. (I reserved it to dye some rope for another project coming here in a few weeks.)


After getting the muck loose, I put the nuts in the oven at a low temperature to dry the remaining black gunk. (100 degrees fahrenheit, for about 2 hours)


Then I brushed off as much of the dried remnants that I could with a wire brush.


As you can see that stuff likes to cling in the crevices. 


The outside of the shell has sharp ridges, so I sanded the nuts smooth with the table sander.


Then sliced the nuts with the band saw. (Scrollsaws work too, but not as easily as a band saw. That tool is the most used in my shop and I'm going to provide some tips about it. Look for my Tool Guide coming soon.)


Now the time consuming part... removing the nut meat and cleaning the inside of the shells. I used nut picks and a dental pick, then followed up with a toothbrush and hot soapy water. After that, I let them air dry on paper towels.

Finally, the creating part! I have made these before, a few decades ago actually, and learned that they needed to be more secure than I have previously done them.

So I hot glued a wreath shape from the nutshell slices, then drilled tiny holes to feed and tie them together with wire.


To hide the security, I added the end cuts from the shells over each wired area with an ape strength super glue... and that built up the look of the wreath.

But, I was also adding a copper color pine cone inside the wreath, so it needed a hanging spot. By twisting a piece of wire, I made a loop for hanging the ornament while attaching the pine cone hanger piece.


After the wreath was built, I used a polycrylic to coat the nutshells... and wish that I hadn't. The glue I used reacted to it and turned white. It's a good thing it only shows on the back of the wreath. Next time, I'll use real polyurethane as I have in the past. (Always learning.) The reason I opted for the polycrylic, was fast drying and no aroma for shipping purposes. 

Anyway, I added a shiny satin ribbon and wove it through the nutshell slices. Then, attached the copper pine cone.


For some "bling" I hot glued two golden styrofoam sprigs at the bow.


Finished!


Ready to hang. 


I thought sending Michelle a little bit of grown in "New York" nature might fit into her woodland decor. 


It's woodsy and glammy at the same time. 


Hope she likes it! 


Thank you for visiting! 


I hope you enjoy everyone's ornament crafts linked below and find some that you will want to do. Happy creating!


FIND MORE HANDMADE ORNAMENT TUTORIALS BELOW AND SHARE YOURS TOO! Be sure to use our tags to share the fun!  #2016OrnamentExchange  and  #2016OrnamentExchangeBH

Thursday, March 3, 2016

DIY Acorn Pendant


This is a super easy fun craft that the kids will enjoy trying with you. It's just an acorn that can be turned into a pendant or keychain piece.

Bake your acorns (350 degrees for about 20 minutes, and let them cool off) and then super glue the two pieces back together.


With a small bit, drill into the middle of the acorn from the top through the center.


You may want to buy small eye screws. I didn't have any on hand, so I cut the head off a straight pin and formed an "eye pin".
(Yes, I made that up.)


Then super glued it into the acorn.  I used a set of pliers to hold the pin in place for a few minutes while it dried.


Then I chose to use "mirror glass" spray paint to make it appear silver. (Chrome paint works too. And, if you like, try gold leaf.)


I used two thin coats. More can be applied as long as it's dried thoroughly between each coat.


Then, slipped it onto a chain. It would make a cute keychain piece too.
Or maybe a tree ornament... or a bunch of them as a garland!


It's a fun craft that would make a nice gift for the kids to give! Let them paint or decoupage the acorns the way they want to. 


~~~~~~~ 
Featured 


Friday, July 3, 2015

July Creative Craft Challenge: Nature Crafts


Last month we had so many wonderful recycling paper roll ideas.  Here are a few favorites you've got to see in case you missed them. 


This cuff bracelet was made by Cindy at Upcycled Design Lab.


Gail made this watering can flower holder from a can and paper towel roll at Purple Hues and Me. 


Wesens-Art created this heart vase from a tape roll. 


So many awesome creations were linked up last month. You can visit them here.
If you've been featured, be sure to grab your badge!

Craft Challenge Feature

Now on to the new challenge! Here are your hostesses:


Kristina & Millie @ 2 Crochet Hooks
Blog/Pinterest/FB/Twitter

Darlene @ Let It Shine

Bonnie @ Our Secondhand House
Blog/Pinterest/FB/Twitter

Robin @ Redo It Yourself Inspirations
Blog/Pinterest/FB/Twitter


**Please follow your hostesses via your choice of social media. Not required but it is the nice thing to do! 

RULES:

1. Project must use the Challenge item (and any others needed to complete your project).
2. Project must be recycled/upcycled/repurposed!
3. You must have a fun time creating your Craft Challenge project!
4. Party runs through the end of the month, so come back often and link up new or old projects!
5. Please link up your own craft challenge projects (no round ups, sale/Etsy sites, etc.)  Inappropriate links will be removed.
CHALLENGE THEME SCHEDULE
January – soda bottle/milk jug
February – cereal/cardboard boxes
March – pair of blue jeans/clothing
April – paper bags/paper
May – silver or flatware/utensils
June – bathroom tissue/paper towel rolls
July – twigs/something from nature
August – vegetable/soup cans
September – dishes/glass/plastic/metal
October – broken jewelry
November – margarine/cool whip bowls
December – unique wreath
Remember, this link up will run throughout the month of July with the hostesses favorites featured at the end of the month, so you have PLENTY of time to find some upcycled inspiration and join the challenge!  
Check back often for new ideas and fun crafts to try and link up your own! If you want to host with us, we'd love to add you to the team, so just let us know! Grab our button and spread the challenge! 

NOW LET THE INSPIRATION BEGIN! 

IT'S RECYCLED NATURE CRAFTS MONTH! 

(Twigs, branches, logs, stones, seashells, leaves, flowers, etc. anything nature made) 

YOU CAN LINK UP AS MANY AS YOU WANT ALL MONTH LONG! 


Creative Craft Challenge just received an award! Voted for as a top 10 blog party!

Thursday, July 2, 2015

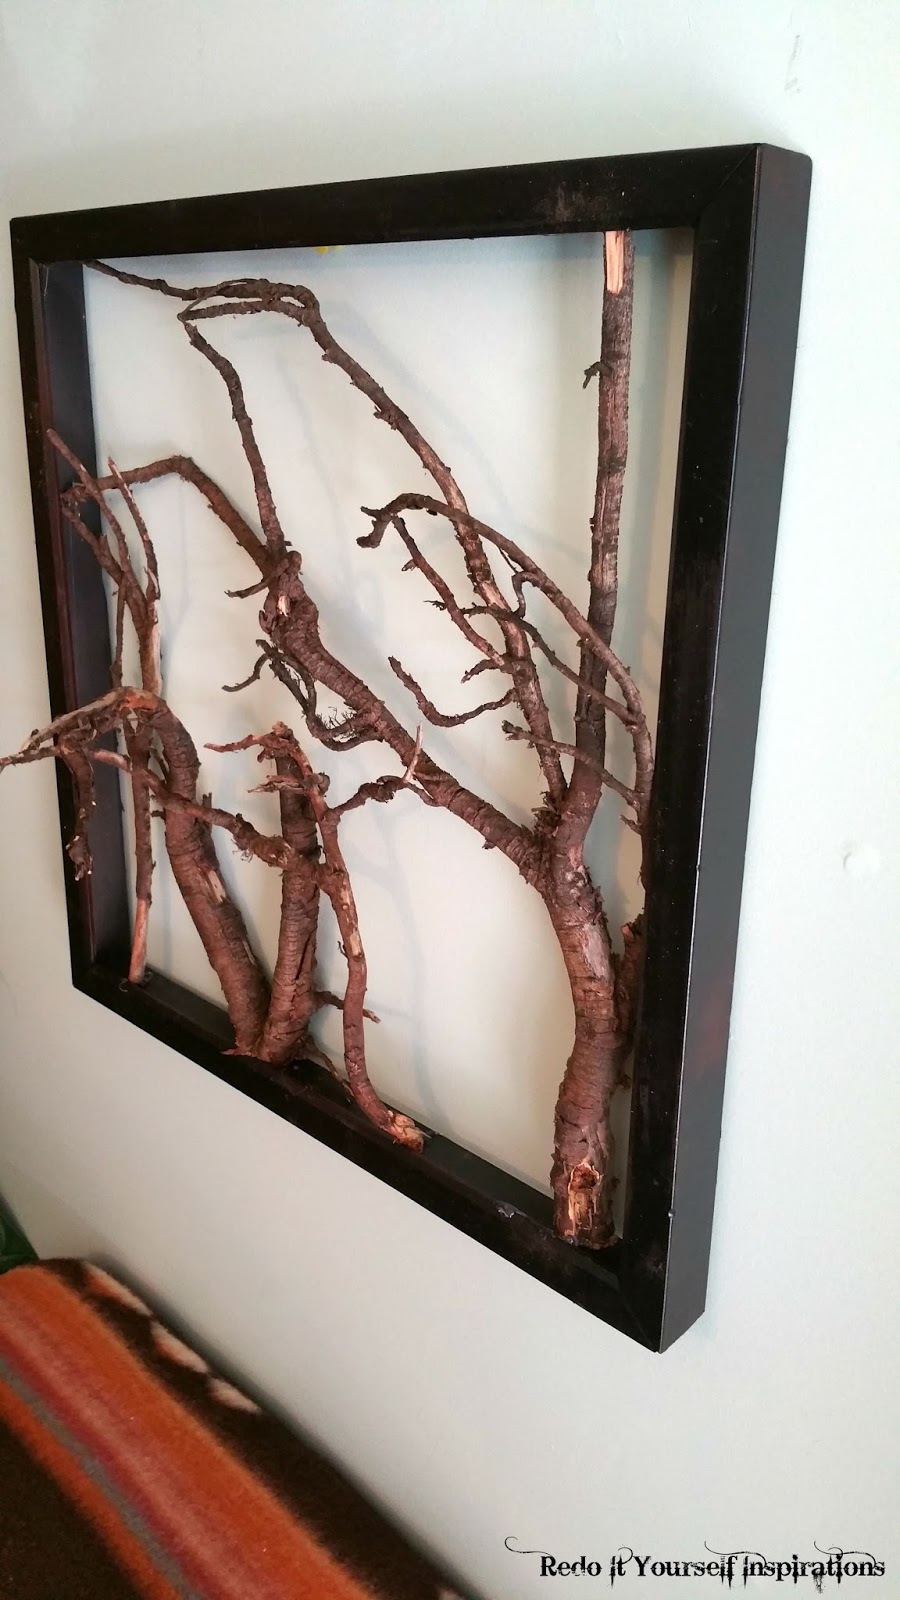
Framed Natural Tree Roots


This month during the Creative Craft Challenge we are working with natural elements such as twigs, stones, shells... anything nature made. It gave me the opportunity to make twig wall art that I've been wanting to do but put it off. 

The frame I used is a framed thrift shop print that we didn't have hung up anymore. So after removing the print from the front, 


I removed the cardboard backing too so that the frame would remain open to expose the wall behind it.


Then went into the woods to the fallen and uprooted trees to grab some of the roots and branches. I wasn't sure what I would use, so I grabbed plenty and different kinds.


After going through the pile for the right ones, I placed them where I would trim them off and glue them permanently.


 I cleaned off the frame and spray painted it to make it new again before trimming the roots in and securing them with hot glue.


The roots appear as winter trees.


I like 3D art and this suits me just fine.


The curly and winding roots are much more interesting than regular twigs and branches.


Have you made twig art before?


~~~~~~~~~~~~~~~~~
featured at