Showing posts with label #hometalktuesday. Show all posts

Tuesday, April 7, 2015

Painted Guitar: Americana Style


We have a few "first guitars" hanging around our youngest son's room. I'm currently working on a complete room makeover for this tween and decided to upcycle a couple of these tattered toys. My first victim of this particular DIY is this one...


Our little man... well not so little now, but he was at the time we bought this guitar at a thrift store... is helping me sort through his keep-toss-donate process of his bedroom.

I have total permission to upcycle this cheap learner guitar to do as I wish.


So I really ripped into it with a plan.
First with a good distress sanding...


And a quick grab of a music book for just a page (don't worry, it's not valuable; missing pages and cover, etc., so it's totally upcycle worthy )


Tearing up the page into several pieces...


just to burn the edges...  ( don't worry... safety is first! Each piece was dropped into the sink and into a glass baking dish filled with water)


because...

those amazing burned edges are making a nice affect while I decoupage them onto the face of the guitar.

(Insert big smile here...the plan is working so far!)


Here is a trail of burned pieces like a map of my creative mind... quite scattered.
But with a purpose.


The Mod Podge was quickly drying so I flipped the guitar over and taped it off to stain half of it in a blue... Indigo by Minwax...

wipe on...


wipe off!

A gorgeous blue stain with a perfect distressed look.


Then the other half is done with Minwax "Crimson"... a beautiful red stain.


Then I white washed the neck with a white acrylic.


After going over the white wash on the neck with a little Crimson... I used the same on the distressed head stock. 


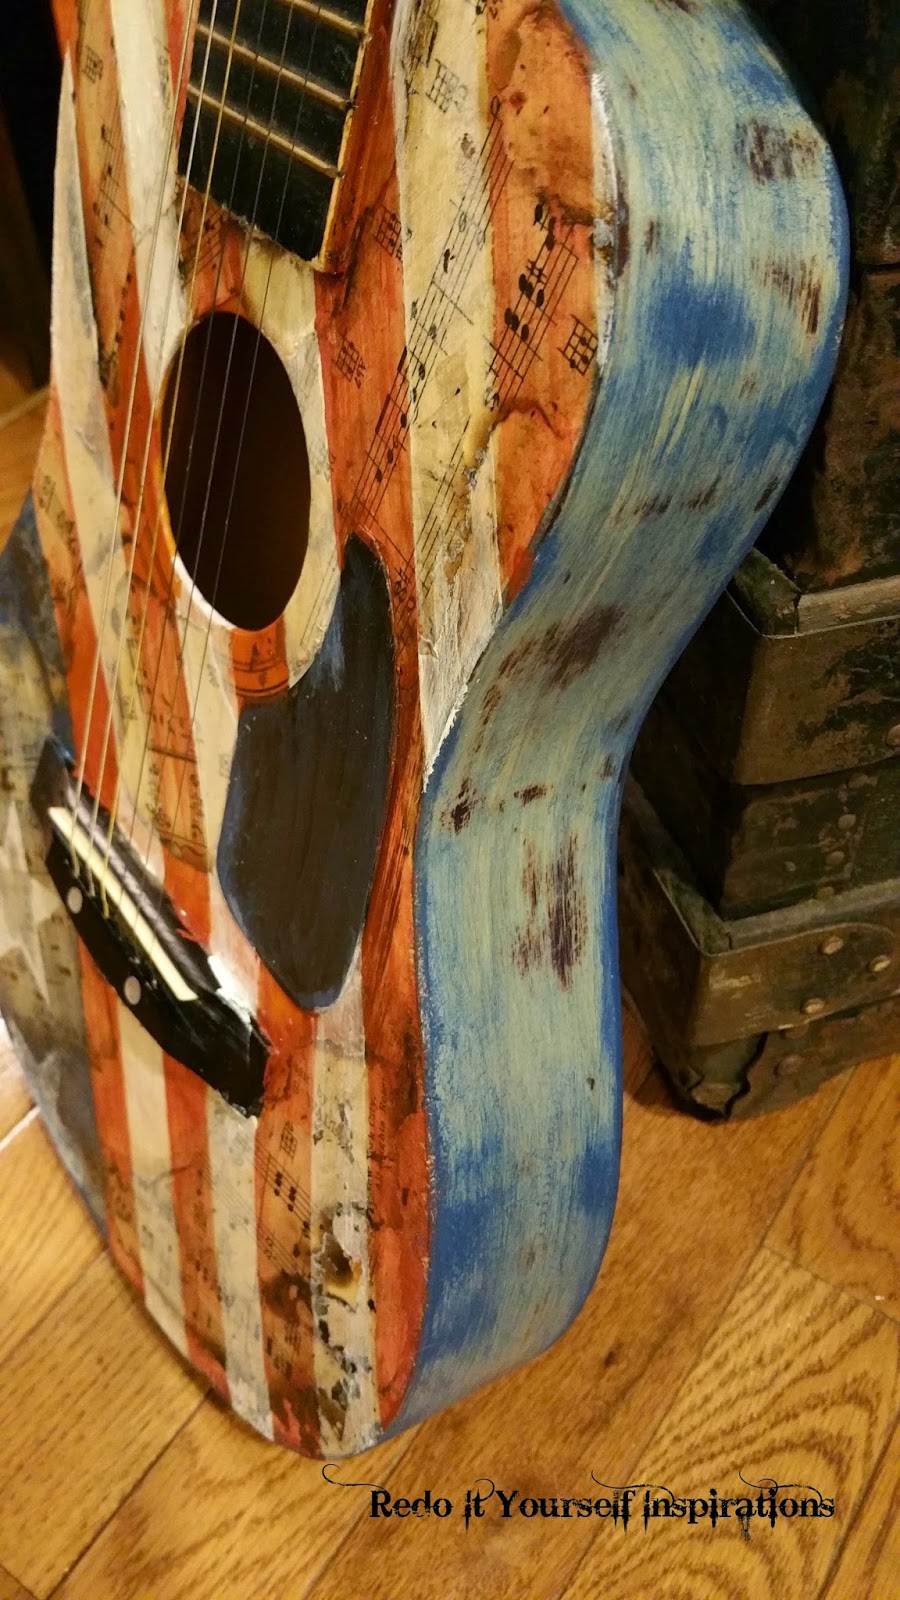
For "Americana"... the stars and stripes are a must!

So I taped off the guitar with my design to paint over the burned music. I used the very same Indigo and Crimson but watered down to make it more translucent.


I was super stoked to use this star from The Crafter's Workshop to make the guitar Americana perfect. I used just the center part for the blue section on the base of the guitar.


I taped it strategically to get a full star and a part of it on each side.


Once my stars and stripes were dry, I gave the entire surface another coat of Mod Podge as a sealant. 


Then I used coconut oil to seal the rest of the guitar, which brought out the colors more and protects the wood.

After re-stringing, I asked for some critique ...


The Ace-Man loves this! He said it's soooo cool!

You can see the music sheet and burned edges peek through the white, crimson and indigo colors. It IS kind of cool!


I think the new tween room theme is off to a great start! He is really excited over it and is being helpful with the decisions.


I can't have him too involved because I have some surprises for him.  I was just lucky the first item was a hit with him! (Pssst... wait until he sees the headboard! I hope it turns out as crazy awesome as I have it in mind!)


Have you done a tween bedroom makeover? I'd love to hear about it!


Featured at 

DIY Decorating Addict
Issue 22


Saturday, March 14, 2015

Kitchen Island Redo


My mom had this old kitchen cabinet island, temporarily, while my father built her a whole new kitchen. When she was ready to toss this out, I ran for it!

I was so happy to bring it home and put it to permanent use in my own kitchen. It's very large and heavy. 

What I love about it... actually a few things... is that is accessible from both sides. 
It has tons of storage space. 
It fits the long and narrow kitchen. 
It gives me a big open work area.

Here it is, on its side for bottom repair work:


My brother made the top for mom while she used it, and I'm going to keep it as is. It suits the style and color of the kitchen.

The drawers function on one side...


and the opposite side had false drawer fronts.
Had.
My dad made cubbies with drop down fronts.
More storage... more happiness!

The cubbie side had router edges and the drawer side didn't so they had to be matched up. After that and some sanding, it was easy painting.


I knew I was going to paint it and make it look antique Country French or shabby.

When choosing the paint, I wanted a nice creamy like "buttah" color.

This chalk paint from Country Chic in Creme Brulee was the perfect choice!


So I painted this delicious color onto the entire base of the island. (I reeeally like it on the wainscoting side!) 


It covered so well with just one coat.


The paint dried quickly and I was dark waxing the very next day.


The Dark Brown Antiquing Wax from Country Chic Paint is beautiful! I love working with it.


Leaving wax on heavy in many areas and wiping and rubbing gave the cabinet a very old look. 

When my youngest son looked at the finished work, he said just what I wanted to hear... "Mom, it looks 200 years old!" 

Quite the opposite of the usual... "Looks brand new" comment. 

awww... thank you, honey! 


My kitchen has a lot of iron accents so my hardware had to be heavy and dark. 

Boy, was I super excited to find these cast iron drawer knobs and pulls in Fleur de lis at the craft store! 


AND, I shopped for wood appliques to decorate the doors. 


I super glued the wood onto the doors (after taking 2 days of deciding how I wanted them); then painted on the Creme Brulee; then waxed the crevices.


I really wanted to add cornices to the corners of the island but there was no space for them. Bummer.

That was until I found these knobs... on clearance! HA! Mini cornices, right????


I attached one and thought it appeared too small. So I added a second one and ended up with a heavier cornice! It did the magic.


Then, as thrifty as I can be, I had this votive candle holder that I don't use anymore. Drilling holes through it to mount on the island would make a great towel grabber for me while cooking.


Doing just that, the end of this island is in front of my cooking range, so this was just a big bonus!


Then, to French up the island some more, I used these dollar store napkins to decoupage the drawers.


It took me awhile to finish this island. It was a lot of decision making in the process to get it all pulled together. It felt like it was forever.


It's finally done and we have a clean kitchen again!
(The tools weren't fun to live with... phrases such as "pass me the drill and the salt please" existed for an entire two weeks. )


I think I pulled off the old Country French feel.

(Now, to work on the modern cabinets in the rest of the kitchen!)


Proudly featured at: