


We could smell a dampy creepy mold in this bedroom of our fixer upper. So we started by removing the carpet and padding that we installed upon moving in. But, that was after hubby repaired a roof leak. So the mold must have been under the flooring all the long.

Here, you can see the result of the water damage on the sub floor.

It was best to gut it. Who knows what lurks beneath.


We discovered there were three floors built on top of each other... with ... 2x4's. Mmm-hmm. I don't know why. The worst floor was the first one, built many years ago.
Chain saws are great tools.

Not surprised, there was extensive mold build up in one area.

It was fuzzy... creepy.

Deciding to rebuild, joists and all, the guys demolished all of the previous construction to start over.

The joists on the first floor that was built looked quite unhealthy... rotted... and showed indication of insects years ago.
Reeeally creeeepy.

Some stylish reddish marbled flooring was on the second floor. Maybe a kitchen? It ripped apart easily.
It reminded me of old tar paper.

Bert was there too. This version of him is somewhat vintage.

And this fine reading material...
Reader's Digest, June 1959 edition.

It served as brief entertainment for me while the guys finished hauling out the old floors. They didn't let me deal with any of it due to a sinus infection.

Then we discovered a concrete sidewalk and a step. There must have been a back door entrance located here at some point in time.

While the guys worked on new beams, floor joists and the subfloor, I set out to shop for finishing supplies and food.

I came back to a clean slate.
My turn to take over.

It was a good time to fill holes and fix walls with joint compound. I patched the areas that needed it.


After a couple of days of "mudding" and sanding, I painted the shiny old ceiling in a flat paint. And the walls in a satin Scottish Green Acre. A light mint green color that looks light turquoise in the sunlight.

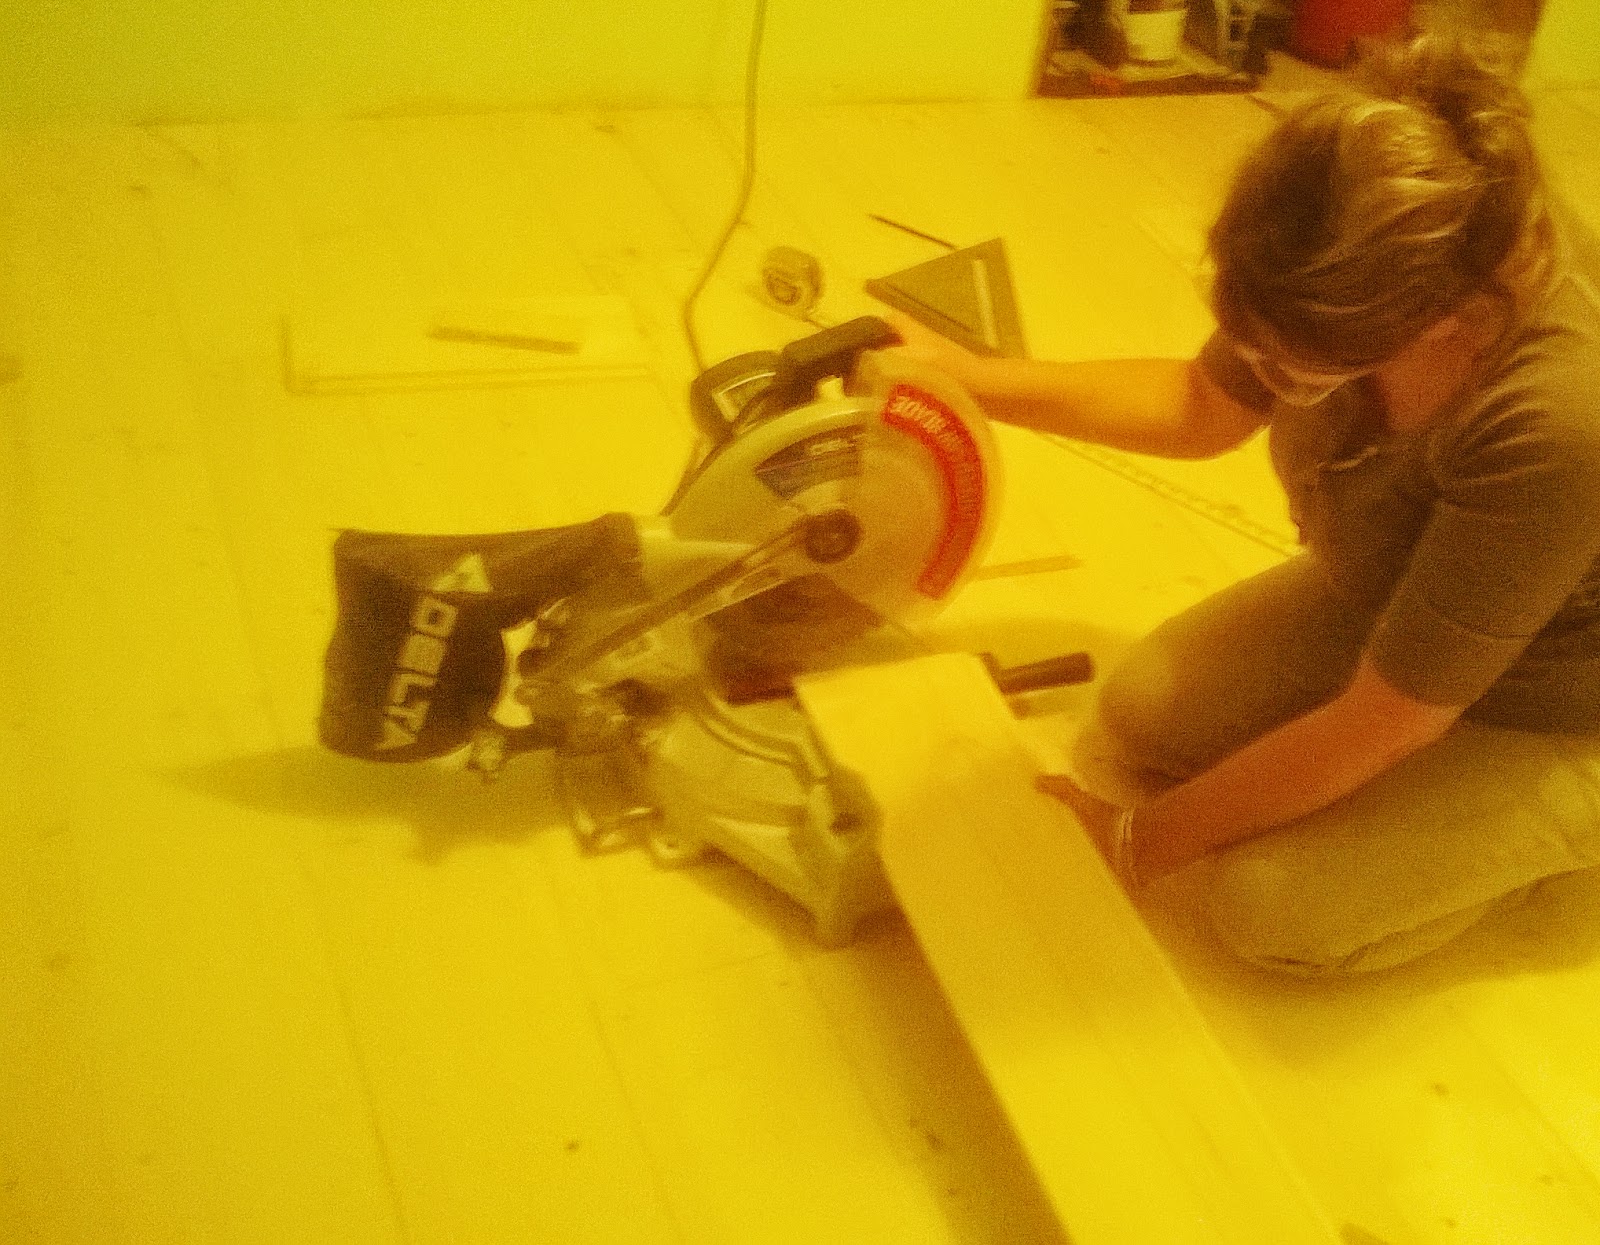
Then I started the floor.
With pine.
Shiplap.
Yes, you read that right. I went with 6" pine shiplap planks. The room doesn't get much traffic and I love aged wood floors with character. I wanted the boards to look just that way.

I staggered the boards as I installed them, allowing to show all nails, like a barn floor.

It smelled nice. I love the aroma of wood.
Certainly better than the mold odor previously.

Nails, knots and seams... OH MY!
It's getting there.

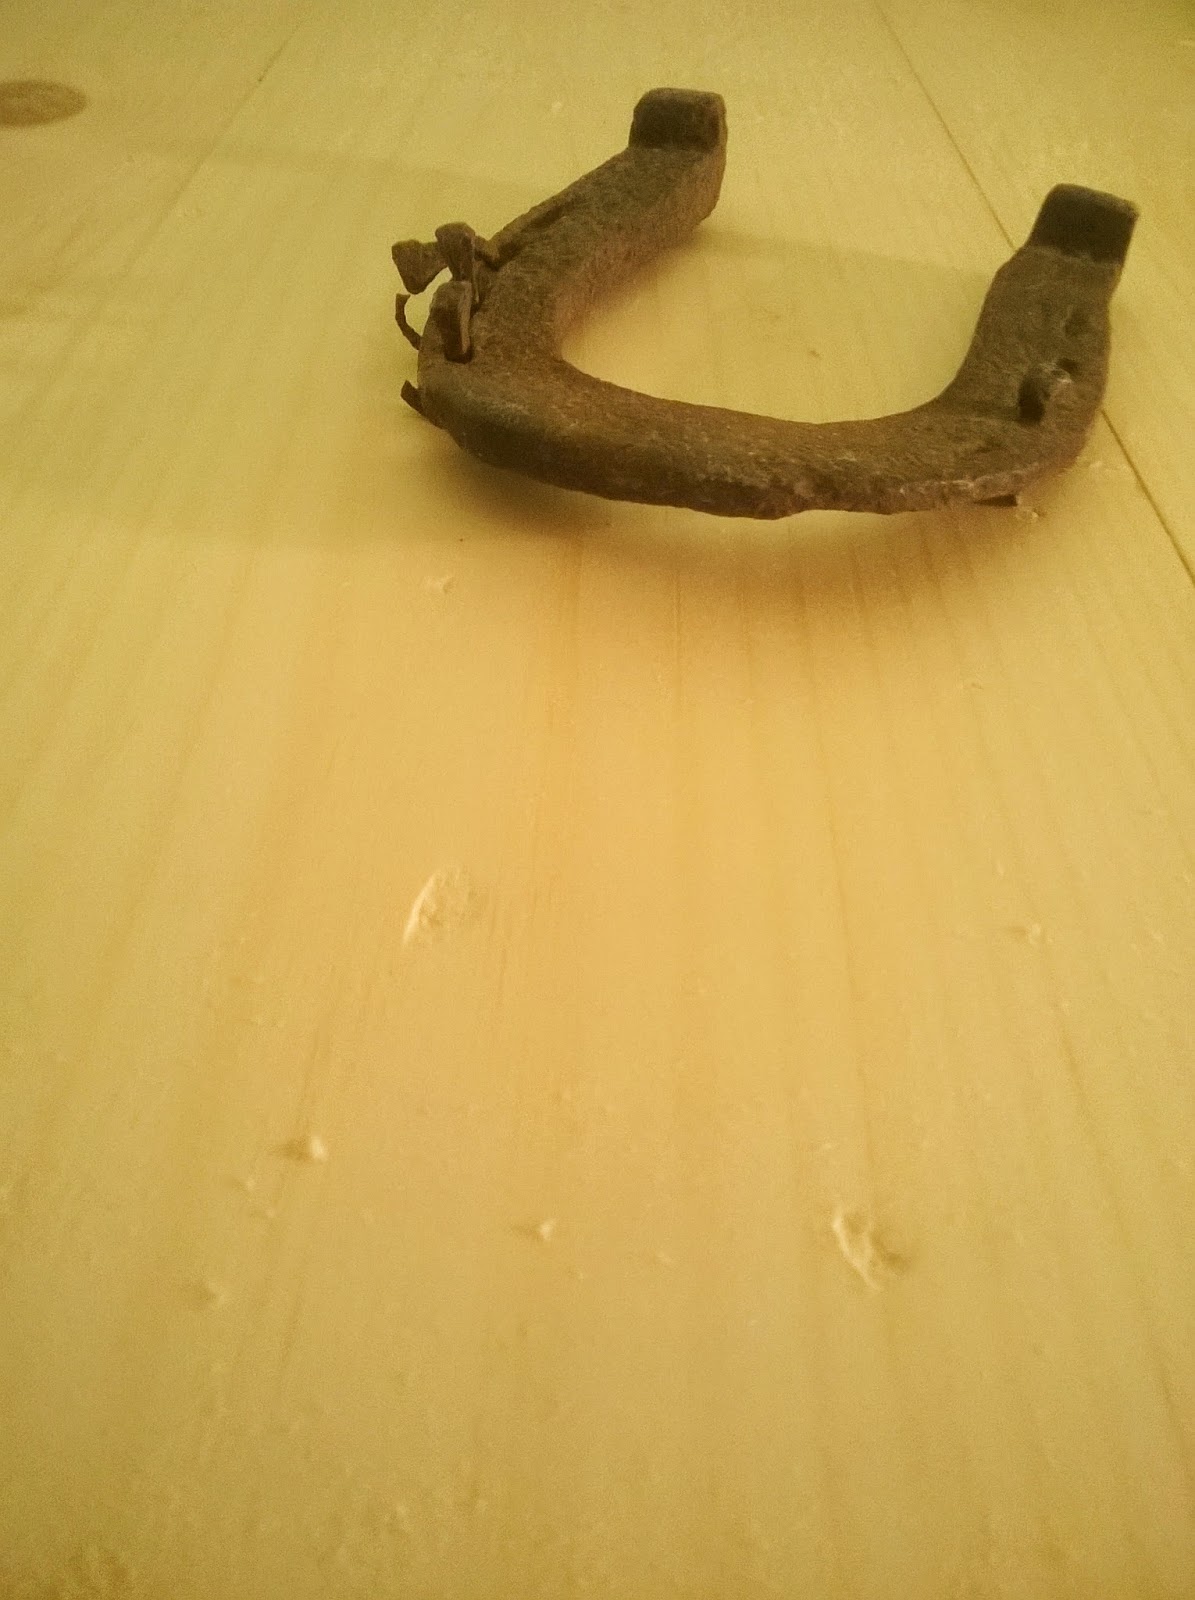
So in order to make this brand new pine look old, it needed to get banged up a bit. Some folks use chains, bags of nails, screws, stones, etc., but I used this horseshoe with curled nails in it. I tossed it around the floor... dropped it... stepped on it and rolled it. It made many different dings and character marks that were just right. It actually took a bit of weight and strength, so the wood was a little tougher than I thought.
Then by using a little Minwax Express Color stain in Onyx, painted into some of the dents with a small brush, it would speed up the age process. I hoped.

Then I wiped the stain.

Then sanded the stained spots.

Then stained over it.
I used three different stain colors. I brush blended the stains so that not one color was prominent and gave each board a unique look. I used Minwax Special Walnut in the knot areas, seams and nail heads. Then a dab of Gunstock here and there for a warm highlight and Golden Oak to blend them together.


It was looking like a barn plank floor by the time I reached the end.

Then came the shine... I used two coats of Minwax Polyurethane, allowing to dry completely between coats.

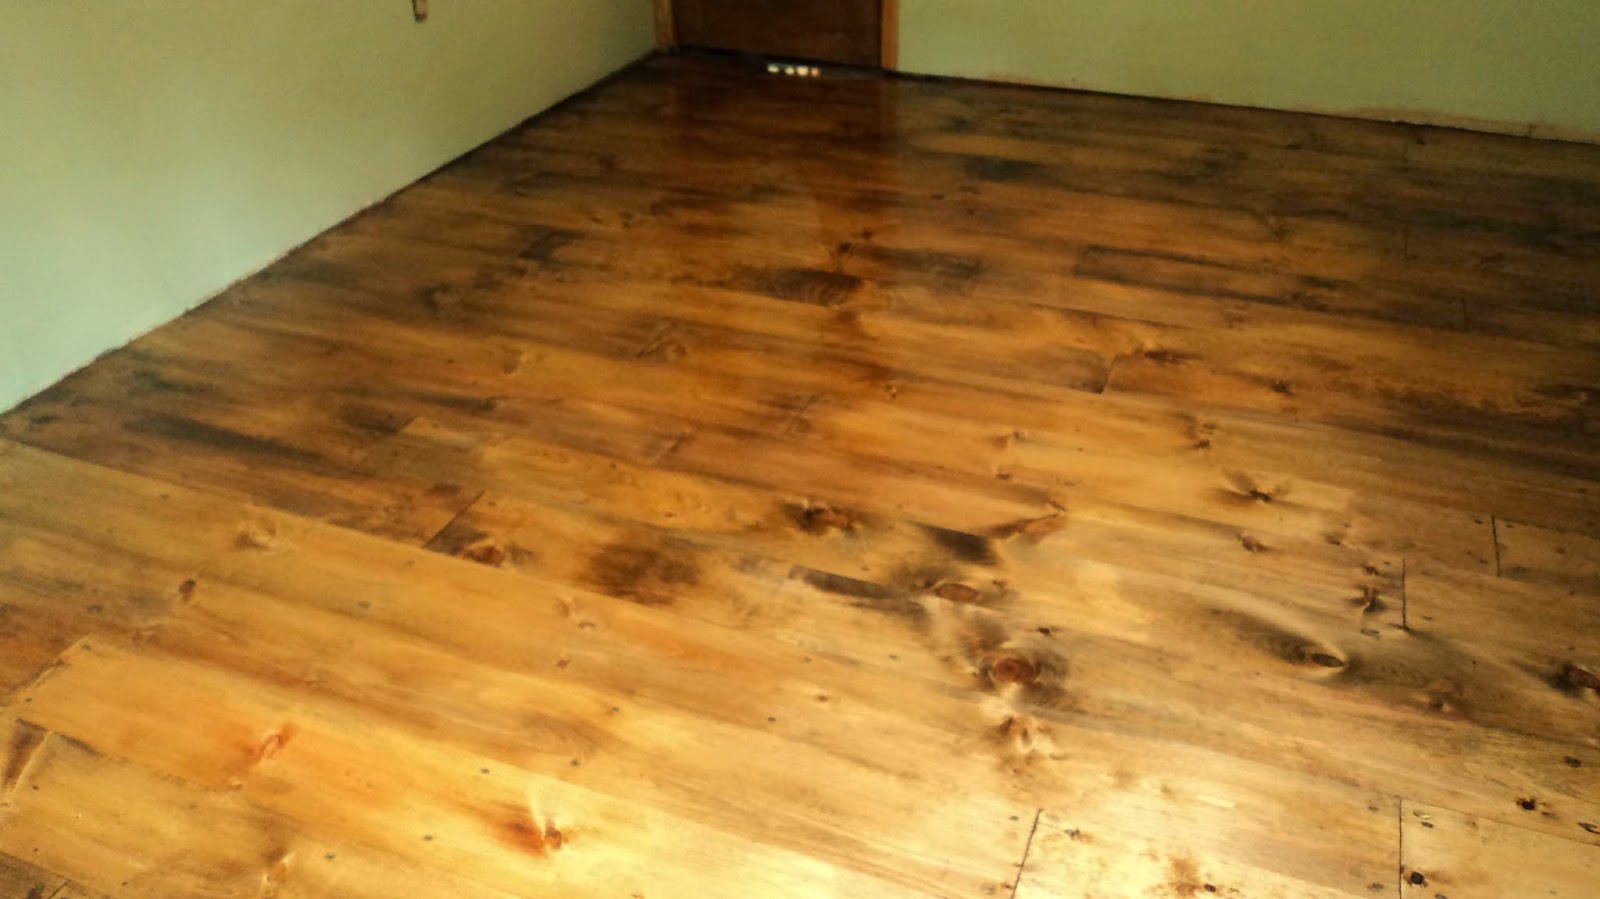
It isn't reclaimed wood, but I got the look for much less AND I get to add my own years of character to it.

Next, is the baseboard to match, crown molding for the ceiling and the finishing up of the closet.
I see a makeover for the furniture in the works... oh and a rug project too. ;-)

I would do this again. Just not right now. It was a long week.

~~~~~~~~~~~~~~~~~~~~~


Amazing transformation! Your hard work paid off. In these old houses you never know what you are going to find! I have one myself and it is always scary to commit to tearing out anything!
ReplyDeleteOh my goodness, that looks like so much hard work, but so worth it! The floor looks absolutely amazing!
ReplyDeleteYou're right; it could be scary. Especially when one issue could lead to more. Luckily, we got through this one with a straightforward demo and rebuild. Redoing the foundation would have been a nightmare.
ReplyDeleteThank you so much for stopping in and the kind comment! :)
Thank you! It was a bit of work, and certainly worth it. I'm so glad you stopped by.
ReplyDeleteGirl! You are working it like a Boss! I love that floor and can't want to see what other awesomeness you come up with!
ReplyDelete~ Ashley
Ha! I was determined. I have the baseboard done now. Just finished it last night. Now for the ceiling molding.
ReplyDeleteI am so glad you came by, Ashley! Thanks so much! ox
Stopping by from the link up! Your floors look great. Thank you for sharing your insight and step by step.
ReplyDeleteThank you for stopping by! Have a great week :)
ReplyDeleteLove the floors!! These are making me regret not taking the plunge and using pine for our floors. Every time you walk on them you can feel pride in a job well done. AWESOME!! What a story about the 3 different floors, and not many people can say their bedroom is on top of a sidewalk. Gotta love it.....
ReplyDeleteHaving oak hardwood in the living room and dining room, I wasn't sure about doing this in the mix. But I ended up liking this more. With an entire upstairs still on the list, I may repeat this. I can't wait to see your updated post, Shaunna, I'm sure your decision will be beautiful! I'm on pins and needles for your photos. :D
ReplyDeleteI was so glad we found fun stuff... Bert reminded me of my oldest son and his Sesame Street days. I wonder if they ever did find "Sesame Street". The song is in my head now. :) The Readers Digest was a blast going through it.
ReplyDeleteThank you for the visit, Barbara!
You bring me inspiration again and again, 10 minis ago I finished painting a wall. I painted the wall because I want to do the floors. I want to do the floors because you inspired me to face getting them finished (and it's madness to do the floors before the walls if you're as messy as me with getting paint everywhere) And here I find you doing wood floors! Extra inspiration to just keep going. That's is worth doing and it is doable. Thank you.
ReplyDeleteGreat job on those floors! Thanks for linking them up to the Found & Foraged Linky party! Hope to see you next week.
ReplyDeleteI can't agree more. Starting from the top and working to the bottom is best. I did the ceiling, then the walls and finished with the flooring. It's very forgiving for messes. Especially since I was patching walls with joint compound and sanding. That is the messiest for me.
ReplyDeleteI'm so excited you are painting and doing your floor! I can't wait to see it! Thank you so much, Stella!
Thank you for being such a kind hostess, Grace! I look forward to next week! :)
ReplyDeleteO my that is simply stunning. You did great! Found you today via Small Victories Sunday. But this is no small victory this is BIG!
ReplyDeleteAhhh, umm, lets not talk about the ceiling ok? (We have high ceilings and I'm not good with ladders.) I tried so hard to get photos I even wrote a blog post to go with them. But not a single shot worked - not even a little bit (humph). I still have to do the wall on the other side, I'll try again. I need to practice my terrible lighting photography. Do you have a blog post on installing skylights?
ReplyDeleteLOL! You and me both with the ladder and high ceilings! Luckily, I managed this one. Hubby has to do the kitchen and livingroom smoke detectors, etc. ... 14 feet is way too much for me. I only use a 6 ft ladder and after a bad fall... and even at that, I still don't go to the top.
ReplyDeleteI understand photos too. I have had some horrible ones, especially with too many projects at once and in a hurry. My photography with the new phone and the shoot and snap camera are just awful. Maybe Santa will bring new cameras to both of us. (fingers crossed) Don't worry, with a before and after, I'm sure you will do very well. Still can't wait to see your post!
No, I didn't post my kitchen skylights and wish I had. It was our first year here and never knew I'd ever be blogging. I even bought a 99 cent pleated shade that I cut in half to block the hot summer sun on both skylights which was so frugal and quite successful. :( But... I will be putting in one in the new upstairs full bathroom! We have a window in the room that I'm converting into a bathroom and the current window is in the best "latrine spot" ... not favorable... especially for men. I'm looking into a venting skylight like our kitchen ceiling windows. I'll certainly post it.
Our money-pit-fixer-upper has had its issues. Even though I don't have all of the before photos, I should do a home tour of what WAS done before I started this blog a year ago. My favorite is my son's room, which is amazing. It was two small rooms that my brother and I turned into a very functional bedroom. I'll post the after and describe the before with a hand drawn print if I can scan it.
Thank you so much, Anna! :)
ReplyDeleteYou are a sweetheart! Thank you so much!
ReplyDeleteI'm following you back! :)
Absolutely gorgeous! The job itself stresses me out just thinking about it! Well done!
ReplyDeleteLiving with a bedroom temporarily piled into the dining room was stressful, but I got through it. LOL!
ReplyDeleteThank you, Bekki!
I wish I could blame the camera, but it's the user through and through. I love that you used a 99 cent shade and made it work for 2 skylights! I'm imaging your latrine window dilemma, I fail to find sympathy only humour *giggle*. I'll be keeping an eye out for your venting skylight post and would also love to see a tour of the work to date. I totally sympathise with the fixer-uppers being money pits, we thought all we would have to do was paint - how wrong we were! I've got my post up which I imaginatively called 'Walls'. It's got nothing on your posts but here's the link anyway http://purfylle.blogspot.com/2014/12/walls.html
ReplyDeleteCheers, Stella
We found old pine plank floors upstairs and now we'll be doing exactly what you did in our downstairs. Thanks for the tips.
ReplyDeleteThe hard work paid off. It looks great! Thanks for linking up to the Bloggers Brags Pinterest Party! I’ve pinned your post to the Bloggers Brags Pinterest Board.
ReplyDeleteIt's beautiful! I love pine floors :) I just wrote a post about mold in homes, and I'm sure glad you got rid of yours! Now, you need to rest after all that hard work :) Thanks for sharing at Together on Tuesdays!!!
ReplyDeleteA super post - I now know how to age wood around my home! Your post has been featured on Witty Hoots this week via #frugalfamilylinky :)
ReplyDeleteWow, what a labor of love and well worth all the effort. Your floors are gorgeous. Happy to hear you took care of that mold problem, very scary stuff. Thanks so much for sharing at Vintage Inspiration Party.
ReplyDeleteoh man, oh wow! That was a lot of work, but the outcome is amazing! what a great way to age a pine shiplap floor!
ReplyDeletecatching you!
Thank you, Catherine! I appreciate your link up so much!
ReplyDeleteI gotta tell you, I have hardwood oak floors we put in a few years ago and I like this one so much more. I spent over 2k just for the oak in the living room and the dining room with a lot less character and lacking the style I desire. This was just a fraction and love it more. I hope you do this and become so pleased with it. Let me know how it goes!
ReplyDeleteThank you for being such a wonderful hostess! I really appreciate the pin! :)
ReplyDeleteI'm thrilled over your visit but more so to be featured! Thank you so much for hosting!
ReplyDeleteAmazing as usual! I love seeing your projects. Though I always chuckle when people distress wood. I have 3 boys who can make things look distressed in no time and here I am trying to keep things mew looking and not distressed :)
ReplyDeleteThanks for sharing with #SmallVictoriesSundayLinkup. I love pinning your creations and hope you join us again this weekend.
This turned out great! I'm not sure I could handle this big of a project, but you have inspired me! Thanks for sharing this with Hump Day Happenings.
ReplyDeleteWow! This is impressive! I don't think I could ever pull off something like this! Thanks so much for sharing we me and my Pin Worthy Wednesday co-hosts! I’ve pinned this!
ReplyDeletexo Chels
Mommie and Wee
I checked your post and so elated it worked for you! You totally brightened your space. I love it! I can't wait for your floor. I've got fingers and toes crossed. And, hey I'm here for you. I'm not perfect but I have ideas to help you through it :D
ReplyDeleteComing from you, Gail, one of my ultimate idols, I am so humbled! Thank you so very much! You turn anything into something. I adore your work. And congrats again winning the Ikea hack. You stood out from the rest and I was devoted to voting for you each day. You deserved the prize. You can bet I'll always be at your link up and reading your newest creation. :D
ReplyDeleteOh my... I remember the days of my sons, (all of them) running cars and trucks on the floors and furniture and I fretted the damage. What I would do now for a house full of boys and toys to do the work I need! LOL! I'll babysit for you any day! Thank you so much, Tanya. I love your visits.
ReplyDeleteActually it wasn't big. Measuring and cutting the plank wood was so easy. Anyone can do it. It only took me one full day from the morning until early evening to lay it out. The distressing, staining and top coating took much more time throughout the week. It was really quite enjoyable and somewhat peaceful work. I was anxious to get it done quicker, but time meant nothing compared to get what I wanted. :) I hope to inspire everyone considering it to do so. The finished product was so worth it.
ReplyDeleteThank you so much for being a great hostess and checking in!
Sure you can do it! It's easy to measure and cut the wood. I know you can. I think the worst part for me was dealing with bedroom items stored in the heavy traffic area of the dining room while I did this. And at that, it was only a week. A temporary eye sore :)
ReplyDeleteThank you so much for stopping by and pinning! I truly appreciate your support!
That looks just wonderful! All your hard work really paid off!
ReplyDeleteThis looks so perfect! I love it! Pinned and tweeted. Thank you for being a part of our party. I hope to see you on Monday at 7 pm. It wouldn’t be a party without you!
ReplyDeleteHappy Saturday! Lou Lou Girls
Yes, the mold was causing issues with my sinuses. I'm glad it's gone.
ReplyDeleteThank you so much for visiting, Betsy!
Thank you, Christine :)
ReplyDeleteI look forward to it! Thanks, Kim :)
ReplyDeleteIt's great to get rid of all that dark yellowish ivory with the brown wall paper strip. I'll let you know how the floors go. Thanks so much Robin for all your support and inspiration!
ReplyDeleteAfter all of that yucky moldy work, your floors look AMAZING! Thanks for linking up at the Home Matters Linky!
ReplyDelete~Bonnie
Whoa! That was a lot of work, but the end result looks beautiful! Thanks so much for linking up to the Be. YOU. Tiful link party
ReplyDeleteWow! That was quite the project! The end result is amazing, though - your floors look beautiful! Thank you so much for sharing at the Talented Tuesday Link Party!
ReplyDeleteThe room smells so nice now. Funny, I've never been used to a cold hard floor in a bedroom before, but this isn't cold after all. Thank you, Bonnie!
ReplyDeleteThank you, Adrienne! So glad you visited :)
ReplyDeleteThank you for being a wonderful hostess! :)
ReplyDeleteFantastic job, my friend! You've knocked another one clear out of the park :)
ReplyDeleteThank you so much, Stacy! As much as I disliked the dining room turning into a storage room, it was well worth the effort. I encourage anyone considering this route to try it. :)
ReplyDeleteI'm so glad you like it!